
This pair of jeans had been in the mending pile for probably
a year with a small tear. My sewing area was in havoc and I had plenty of other
jeans to wear, so these jeans just got put off ‘til later when I actually feel
motivated to do mending’.

My husband had a new pair of jeans that had just torn, so
while I was mending those, and while I had blue thread in the machine. As I
mended, a light bulb went off in my head, and I realized this pair could be the
answer to my problem – the problem I had of no skinny-jeans that fit, so
therefore no cute boots this winter.
I have seen several tutorials on changing regular jeans into maternity jeans, and decided that is just what I wanted to do with this old pair of jeans. This pair, neglected and forgotten would soon become my everyday jeans- old flares turned into maternity skinny jeans. Win-win.
I have seen several tutorials on changing regular jeans into maternity jeans, and decided that is just what I wanted to do with this old pair of jeans. This pair, neglected and forgotten would soon become my everyday jeans- old flares turned into maternity skinny jeans. Win-win.
So here’s how I did it, and how you can do it too. This post
will be about how to turn any pair of jeans into maternity pants. The next post
will be about turning any pair of flares or boot-cut into skinny jeans.
You’ll need the elastic top- you have a few options. You
could buy a maternity panel, but unfortunately this tutorial may not be a lot
of help, because that is not what I used. You could also use a bella band. I
bought a few with my last pregnancy, that I loved for a while but soon outgrew-
and I felt they were always slipping out of place. That is essentially what we
are going to be making to sew to the top of the jeans, so if you want to save
yourself a few steps, you can buy one of those and use that.
I didn’t want to give up my bella bands for jeans, (though I didn’t wear them for the tops of pants, I did really love them when I was nursing) plus, because I sew on impulse, and didn’t want to wait to go to the store or to order one, so I thought of another solution. Old cami. Again, this cami was in the drawer (you’ll note the wrinkles from having not been worn in a very very long time) because it was too small and too short. I would likely never wear it again and I’m not sure why I kept it, but I’m glad I did.
So to summarize- you can get a maternity panel, a bella band, or a cami that fits really snug.
First, if you’re using a cami, make sure it’s snug. Rather than trying to get this on, I decided to measure it against the bella band I already had. I measured for width, to be sure it was the same as big around. If yours is a little wider, or doesn’t fit super snug, you can always sew up the side to make it smaller around.
 |
| measuring for width against the bella band |
Next, I measured for height. Again, I just laid it up next to the bella band, and in this case it was right up under the shelf bra. Basically you want it to come to the top of your baby bump, and down just past the bottom of it. Not too much higher, or else it’ll bunch up under your shirt. DO NOT cut the finished off hem at the bottom of your cami because that will finish off the top of your maternity panel. Cut it to size up near the shelf bra.

I went ahead and saved the top of the cami that I cut off in case I need some straps or elastic or something down the road, but we’re done with it for this project.

Next, use a seam ripper to rip out the zipper. We will be
sewing over this area and don’t need a zipper to get in the way.

Next, go ahead and stitch the zipper area closed- at least
most of the way. Don’t backstitch, so it will rip out easily, This stitching is
temporary- you’ll see why in the next step.
Go ahead and try on the jeans now. The stitching for the
zipper will likely rip out a little and that’s okay- it will help you know
where to sew your band.

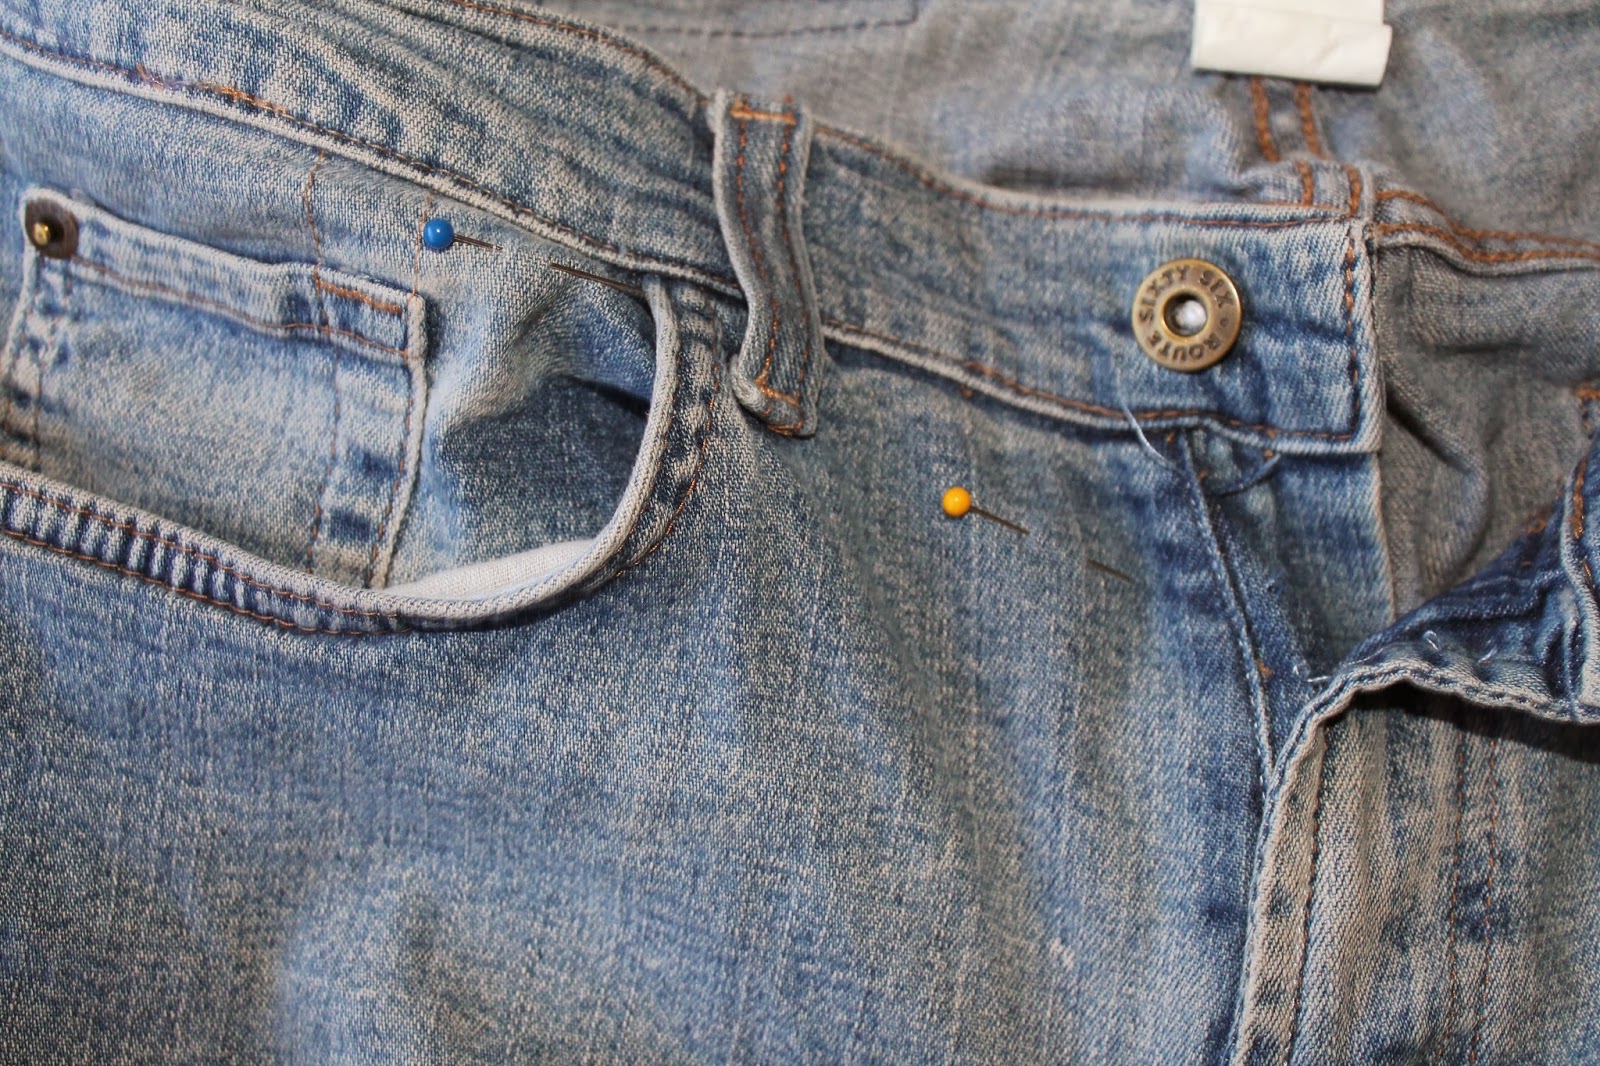
While I had the jeans on, I went ahead and put a couple pins
in where I wanted the bottom of the band to go. One near the zipper, and then
one a little further to the side- just because I figured it wasn’t going to be
in a straight line all the way across. It ended up preserving my pocket-use
(yay! I’ve noticed a huge oversight in a lot of maternity pants- the lack of
pockets!) and since it was just above the ring-pocket, I didn’t have to worry
about stitching over lots of layers of denim.
Pin the band to the front of the jeans. Be sure you’ve got right sides together. Your band will probably be smaller than the waistband on the jeans and that’s okay. Go ahead and pin all the way across the front anyway. Remember you’re pinning so that you’ll be sewing the cut edge of the cami, and leaving the hemmed edge to become the top of your band. One less seam to have to finish off when you’re done.
Pin the band to the front of the jeans. Be sure you’ve got right sides together. Your band will probably be smaller than the waistband on the jeans and that’s okay. Go ahead and pin all the way across the front anyway. Remember you’re pinning so that you’ll be sewing the cut edge of the cami, and leaving the hemmed edge to become the top of your band. One less seam to have to finish off when you’re done.

Now sew it. Don’t forget to re-sew the zipper area since you
didn’t back-stitch it.
Try it on again, and it should look something like this. If it needs adjusted, now is the time to rip it out and try again. If you’re satisfied with it, go ahead and note/pin where you want the back to lay. Mine was just below the belt-loops. Again, this way I didn’t have to stitch through several layers of fabric, and I didn’t have random belt loop ends sticking out under the band. If yours does not line up that way, consider using a seam ripper to remove the belt loops- you’ll thank yourself in a minute.

Go ahead and turn the pants such that the band goes all the way around the jeans now. It will look like this- the band will be inside-out and the jeans will be right-side out. Now pin and sew around the back. (I’m not actually sure I pinned it- I think because I had such a nice line to follow with the bottoms of the belt-loops. Up to you.)

Try them on again, and you should be quite happy with the results!
Note: I do not have a serger, plus this particular pair of jeans was pretty thin- not your traditional thick denim, so I left the top of the original jeans intact. It’s not bunchy and doesn’t bother me a bit. If your jeans are thicker, and if you have a serger (lucky you!) you will probably want to go ahead and cut off the top part of the jeans after the band is sewn on and serge the edge so it doesn’t ravel.
Try it on again, and it should look something like this. If it needs adjusted, now is the time to rip it out and try again. If you’re satisfied with it, go ahead and note/pin where you want the back to lay. Mine was just below the belt-loops. Again, this way I didn’t have to stitch through several layers of fabric, and I didn’t have random belt loop ends sticking out under the band. If yours does not line up that way, consider using a seam ripper to remove the belt loops- you’ll thank yourself in a minute.
Go ahead and turn the pants such that the band goes all the way around the jeans now. It will look like this- the band will be inside-out and the jeans will be right-side out. Now pin and sew around the back. (I’m not actually sure I pinned it- I think because I had such a nice line to follow with the bottoms of the belt-loops. Up to you.)
Try them on again, and you should be quite happy with the results!
Note: I do not have a serger, plus this particular pair of jeans was pretty thin- not your traditional thick denim, so I left the top of the original jeans intact. It’s not bunchy and doesn’t bother me a bit. If your jeans are thicker, and if you have a serger (lucky you!) you will probably want to go ahead and cut off the top part of the jeans after the band is sewn on and serge the edge so it doesn’t ravel.


Thanks for this tutorial! I can't wait to try this out for myself--maternity jeans are expensive!
ReplyDeleteYou'll do great! Yes, they are so expensive, especially for all the longer you get to wear them. I've thrifted a couple pairs and then made this pair.
DeleteThis is really helpful. Thank you1
ReplyDeleteIt's really such a good post. Thanks for this tutorial.It's really helpful. I am not pregnant, but these maternity jeans with the full band look so comfy and easy. I love this look! Practical, comfy & cute all rolled into one.Thanks for this post.
ReplyDeleteThanks so much for reading! I'm glad you love it.
Delete