Tuesday, February 25, 2014

Homemade Salted Caramel Latte

Since I’ve been pregnant I’ve been trying to steer a little clear of coffee. At least to keep the caffeine intake down to an acceptable level. I’ve discovered, though, that a latte has less caffeine than a brewed cup of coffee, so I have found a new love.

This recipe will be a copycat Salted Caramel Latte. I do use brewed coffee for this, but put less in my cup than usual, so we’re still good on our caffeine intake, don’t worry.

To start out with, you will probably want to go ahead and invest in a milk frother. They are fairly inexpensive and it will definitely pay for itself by your having skipped a few Starbucks runs. Wouldn’t take long at all, especially if you make a coffee run that includes more than one drink.

Here are a few options. I have both, my sweet hubby got them both for me for Christmas this year, not sure which one would work better, and honestly, I love both of them.

Pros and cons for each.

The battery powered one
PRO: A little faster to wash
PRO: Less pieces to get out/wash
PRO: Easy to froth milk right in your cup. (Make sure it’s just milk. Don’t add your coffee yet.)
CON: Takes a battery
CON: Must not overload your cup, or froth after you’ve already creamed your coffee. Trust me, you don’t want the mess.

The self-contained one
PRO: Make a double batch easily
PRO: Self-contained beaker makes for less mess and easier to know how much you can froth at once without making a mess
PRO: Does not need a battery
CON: More pieces to get out/wash
CON: (Obviously) Have to froth milk in a separate container from your cup

So equal playing fields, all in all. Just depends what you want to try first.

Okay. Here’s how to do it.
First, go ahead and get your coffee brewing. I make mine the regular strength that I usually do.

Now, warm up some creamer or milk or some combination thereof. About 40-60 sec in the microwave is great. For a big mug, I’m using about 1/4 to 1/3 cup of creamer and about 6-8 oz. coffee. If you like yours a little more or less creamy, adjust accordingly. My hubby is the candy-coffee drinker, and likes his the same way I do, with about 1/4 cup creamer. Play with it and see what you like best. You can always add more creamer after you taste your creation, so start with a little and go from there.

Froth! This is the most fun part. Both my frothers say to let the milk set for one minute before using, and this does seem to help the bubbles stay in my cup longer. Make enough froth to fill your cup half-full.

Doesn’t matter what order you put the items in your cup. When I’m using the battery frother, I warm the creamer directly in my cup, so coffee comes second. When I’m using the beaker, I warm it up in the beaker, and usually put coffee in my cup first. Again up to you. If you take sugar, go ahead and mix it in your coffee before adding the froth, or just add it to the creamer before you warm it. I’ve done it all combinations of ways and it seems to work just fine.

If you’re wondering how I got the coffee in the pre-foamed cup without destroying the foam, it’s not as hard as you might think. Just pour the coffee along the side, and watch the foam rise. It’s kindof fun.

Last, after your coffee with its nice topping of foam is in your favorite mug, drizzle caramel ice cream topping over top.  Shake a few shakes of salt over top and enjoy!


Variations: Add some English Toffee Torani syrup for an extra treat! It's delicious.


Notes: I use homemade creamer, made from milk and sweetened condensed milk. I actually make my own sweetened condensed milk too, and the recipe for both can be found here. I like that I can count (and pronounce) all the ingredients in my creamer. Milk, dry milk, sugar. C’est tout. Not all the preservatives you’ll find in a creamer from the store. Up to you. Not sure how store-bought creamer performs with the frothers, but if you’ve tried it, let me know.

pin it

Find me and lots of other yummy recipes on Miz Helen's Full Plate Thursday Link Party

Sunday, February 23, 2014

Skinny Jeans From Old Jeans Tutorial

We’ve all had a pair (or two, or three. Let’s be honest here) of jeans that we never ever wear because either A) we have too many other jeans we like better, or B) because there’s something wrong with them- the fit, the cut, something. I have a pair like this that I recently turned into maternity jeans and here’s the main reason. My other maternity jeans were not skinny-jeans. They did not work with my boots and I was really missing all my cute boots this winter. So I found a pair and a solution right in my own closet. On the bottom of the stack. Because I never wore them anymore. Now they’re my favorite pair.

Here’s how to turn regular flares or bootcut jeans into skinny jeans in an easy afternoon.

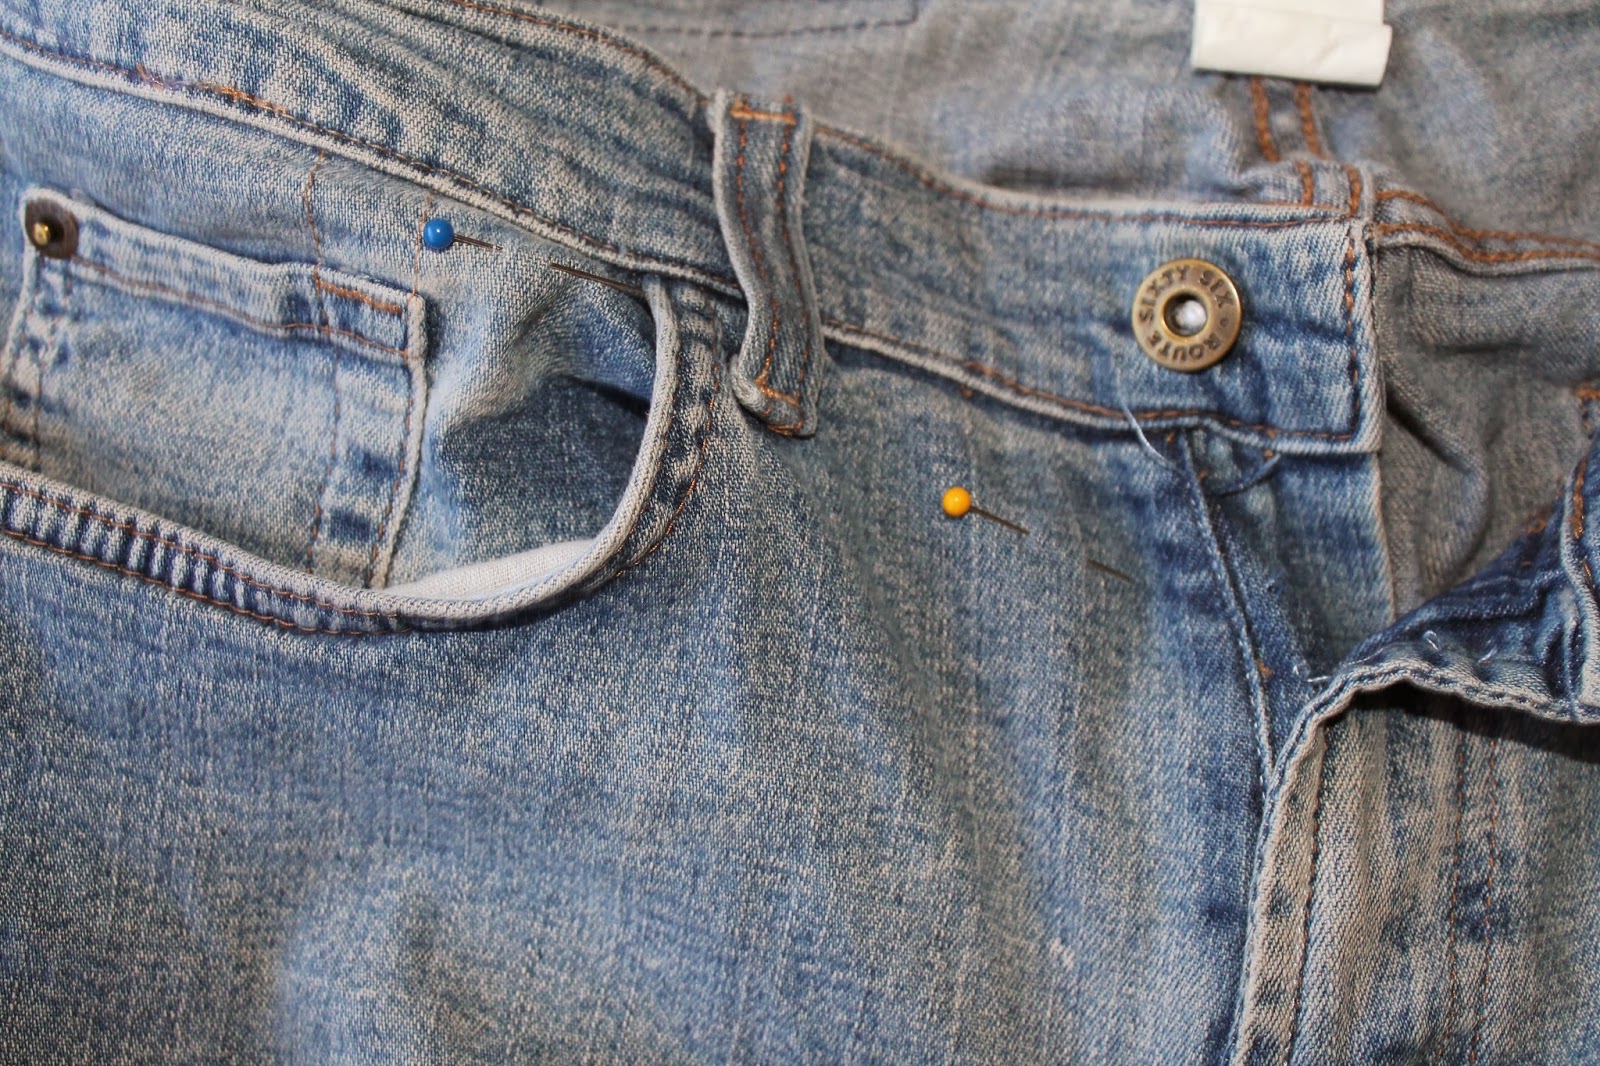
1) Lay your jeans out flat and determine at what point they start flaring out again. Put a pin there to mark it. Mine was just below the knee- yours probably will be too.
(Please note that the rest of the instructions have us working with the inner seam of the jeans. I had pinned the outer seam for the picture, and ended up moving it to the inside seam.)


2) Next, (and there’s probably another way to do this, but this seemed easy enough, dorky as it may be) stick your foot into the end of the leg and pin the cuff around the widest part of your foot. See picture. This will ensure that you’re able to actually get the jeans over your foot once you’re finished. Pin it as tight or loose as you like – my jeans have a bit of stretch in the fabric, so I went ahead and made for zero ‘wiggle room’, but if you have regular denim you may want to add a finger-width in there just in case. Your call.


3) Measure the amount you want to keep (the part that was around your foot in the previous step). Mine was right at 6”. Easy to remember so I didn’t write it down.


4) Here you get kindof a visual of the area that will be taken away. Pin to pin, essentially.
Please note that this is not the actual piece that will be taken off, but is just to give you a visual.


5) Turn your jeans inside out. With a seam ripper, rip out the inner seams from the cuff all the way up to the pin at the knee. I chose the inside of the leg but you could do the outside instead if you want. It doesn’t make a whole lot of difference.


6) With jeans still inside out, lay out the part you want to keep, measured to the length you figured out in step 3. Mine was 6”. Mark it with a pin but don’t pin it together just yet.


7) Go ahead and, using your seam ripper, rip out the cuff  where you will be stitching it together. Now pin the two together.


8) Laying the jean leg as smoothly as you can, taper from the top of where it’s ripped out (at the knee) all the way to the cuff. It may not lay very smooth and that’s okay- just make sure that it’s a nice, even taper all the way down. The triangle sticking out (the part you’re cutting off) should lay fairly smooth. DO NOT CUT IT OFF YET.


9) Stitch along the previous stitching line. I got this wrong the first go-round and had to start over. In the below picture, I’m holding the pin where the correct stitching line was on mine. You can see my first attempt (light blue thread) over to the left just a little. I left it there till I stitched the correct one, then I ripped out the wrong one. No biggie. This was important to me, because as you’ll see in the next picture, nobody will be the wiser that these jeans have been altered, because the fading by the seams is all still there just like when I bought them. (Okay, maybe not just like. They’re likely a bit more faded now because I got them back in high school. But you know what I mean.)


10) Try them on. Make sure you like the way they fit before cutting off the extra triangle. If it’s too big or too small, rip out the new seam and start over, adjusting accordingly. You’ll be glad you did. When you’re satisfied, cut off the extra triangle piece.


11) Restitch the cuff. If you did the inside seam of the jeans like I did, restitch over the seam, in the same stitching line that the manufacturer used. I should probably have used Blue Jean Gold thread for the topstitching but didn’t want to run to the store, and the light blue blends in pretty well for this pair. Pick out any remaining gold threads.


Finished! Good job! Don your jeans and grab your boots.


 pin it


Wednesday, January 29, 2014

How to Turn Jeans Into Maternity Jeans

This pair of jeans had been in the mending pile for probably a year with a small tear. My sewing area was in havoc and I had plenty of other jeans to wear, so these jeans just got put off ‘til later when I actually feel motivated to do mending’.


My husband had a new pair of jeans that had just torn, so while I was mending those, and while I had blue thread in the machine. As I mended, a light bulb went off in my head, and I realized this pair could be the answer to my problem – the problem I had of no skinny-jeans that fit, so therefore no cute boots this winter.

I have seen several tutorials on changing regular jeans into maternity jeans, and decided that is just what I wanted to do with this old pair of jeans. This pair, neglected and forgotten would soon become my everyday jeans- old flares turned into maternity skinny jeans. Win-win.

So here’s how I did it, and how you can do it too. This post will be about how to turn any pair of jeans into maternity pants. The next post will be about turning any pair of flares or boot-cut into skinny jeans.

You’ll need the elastic top- you have a few options. You could buy a maternity panel, but unfortunately this tutorial may not be a lot of help, because that is not what I used. You could also use a bella band. I bought a few with my last pregnancy, that I loved for a while but soon outgrew- and I felt they were always slipping out of place. That is essentially what we are going to be making to sew to the top of the jeans, so if you want to save yourself a few steps, you can buy one of those and use that.

I didn’t want to give up my bella bands for jeans, (though I didn’t wear them for the tops of pants, I did really love them when I was nursing) plus, because I sew on impulse, and didn’t want to wait to go to the store or to order one, so I thought of another solution. Old cami. Again, this cami was in the drawer (you’ll note the wrinkles from having not been worn in a very very long time) because it was too small and too short. I would likely never wear it again and I’m not sure why I kept it, but I’m glad I did.

So to summarize- you can get a maternity panel, a bella band, or a cami that fits really snug.


First, if you’re using a cami, make sure it’s snug. Rather than trying to get this on, I decided to measure it against the bella band I already had. I measured for width, to be sure it was the same as big around. If yours is a little wider, or doesn’t fit super snug, you can always sew up the side to make it smaller around.

measuring for width against the bella band

Next, I measured for height. Again, I just laid it up next to the bella band, and in this case it was right up under the shelf bra. Basically you want it to come to the top of your baby bump, and down just past the bottom of it. Not too much higher, or else it’ll bunch up under your shirt. DO NOT cut the finished off hem at the bottom of your cami because that will finish off the top of your maternity panel. Cut it to size up near the shelf bra.


I went ahead and saved the top of the cami that I cut off in case I need some straps or elastic or something down the road, but we’re done with it for this project.


Next, use a seam ripper to rip out the zipper. We will be sewing over this area and don’t need a zipper to get in the way.

Next, go ahead and stitch the zipper area closed- at least most of the way. Don’t backstitch, so it will rip out easily, This stitching is temporary- you’ll see why in the next step.

Go ahead and try on the jeans now. The stitching for the zipper will likely rip out a little and that’s okay- it will help you know where to sew your band.


While I had the jeans on, I went ahead and put a couple pins in where I wanted the bottom of the band to go. One near the zipper, and then one a little further to the side- just because I figured it wasn’t going to be in a straight line all the way across. It ended up preserving my pocket-use (yay! I’ve noticed a huge oversight in a lot of maternity pants- the lack of pockets!) and since it was just above the ring-pocket, I didn’t have to worry about stitching over lots of layers of denim.


Pin the band to the front of the jeans. Be sure you’ve got right sides together. Your band will probably be smaller than the waistband on the jeans and that’s okay. Go ahead and pin all the way across the front anyway. Remember you’re pinning so that you’ll be sewing the cut edge of the cami, and leaving the hemmed edge to become the top of your band. One less seam to have to finish off when you’re done.


Now sew it. Don’t forget to re-sew the zipper area since you didn’t back-stitch it.

Try it on again, and it should look something like this. If it needs adjusted, now is the time to rip it out and try again. If you’re satisfied with it, go ahead and note/pin where you want the back to lay. Mine was just below the belt-loops. Again, this way I didn’t have to stitch through several layers of fabric, and I didn’t have random belt loop ends sticking out under the band. If yours does not line up that way, consider using a seam ripper to remove the belt loops- you’ll thank yourself in a minute.


Go ahead and turn the pants such that the band goes all the way around the jeans now. It will look like this- the band will be inside-out and the jeans will be right-side out. Now pin and sew around the back. (I’m not actually sure I pinned it- I think because I had such a nice line to follow with the bottoms of the belt-loops. Up to you.)


Try them on again, and you should be quite happy with the results!

Note: I do not have a serger, plus this particular pair of jeans was pretty thin- not your traditional thick denim, so I left the top of the original jeans intact. It’s not bunchy and doesn’t bother me a bit. If your jeans are thicker, and if you have a serger (lucky you!) you will probably want to go ahead and cut off the top part of the jeans after the band is sewn on and serge the edge so it doesn’t ravel.


Ta da! In the next post we will read how to turn any pair ofjeans into skinny jeans.

 Pin It

Thursday, January 2, 2014

God's Perfectly Planned Will and New Picture for 2014

I have a word for this year. Not necessarily my 'one word' for 2014, but a reminder I wish to carry with me always.

Boulé
The Greek word used to describe counsel, decision, motives, plan, or purpose is used 12 times in the New Testament.
(Luke 7:30; Luke 23:51; Acts 2:23; Acts 4:28; Acts 5:38; Acts 13:36; Acts 20:27; Acts 27:12; Acts 27:42; 1 Corinthians 4:5; Ephesians 1:11 and Hebrews 6:17)

This word was emphasized in a recent session of Bible study I participated in and I was so blessed.
(It was Beth Moore’s A Woman’s Heart, session 7. Download the video here


Here’s an excerpt from the workbook on that day.
“Purpose” — Greek transliteration, boule, “will, project, intention, as the result of reflection; counsel, decree, aim, or estimation, as it denotes deliberation and reflection.” “Boule as the first stage of inward ‘deliberation’ … thought …. Secondly, boule denotes the final result of inward deliberation.”

It carries meaning both of our purpose, God’s will for us; and of deep thought and planning regarding our lives.

I loved the emphasis on God’s purpose always being for our good. He may allow us to go through suffering, but only if it will result in our ultimate good. Better character, lessons learned, empathy gained, or something else Divinely appointed.
Even Christ submitted to God’s purpose, will, and planning for His own life in Luke 22:42:

Luke 22:42 "Father, if you are willing, please take this cup of suffering away from me. Yet I want your will to be done, not mine." NLT

Acts 2:23 “this Man, delivered over by the predetermined plan and foreknowledge of God, you nailed to a cross by the hands of godless men and put Him to death.” NASB

God gave me a picture that day, and here it is for each of you to be blessed by as well. May it serve as a reminder that God’s boulé will, His deliberately planned purpose for you is based on His great love for you and He will cause it to result in our ultimate good. Be encouraged that today is only temporary, and one day, we will experience that good that comes of the plan He has for us.


Ephesians 1:11 “Also we have obtained an inheritance, having been predestined according to His purpose who works all things after the counsel of His will.” NASB

Jeremiah 29:11 “For I know the plans I have for you,” says the LORD. “They are plans for good and not for disaster, to give you a future and a hope.”” NLT


 Pin It

Sunday, December 22, 2013

Easy Italian Wedding Soup


It is a snowy day. I am pregnant. I want soup. But not just any soup. I want Italian Wedding Soup. And we don’t have any cans of it, and last time I used the canned stuff it wasn’t as good as I remembered anyway. Not to mention I’m snowed in and can’t get to the store. (Or rather, my husband has the carseat, and even if he didn’t, the car doors are frozen shut)

My one year old looking at the first real snow this winter


Pregnancy tastebuds persist.

I remember that when I was grocery shopping I bought both hot Jimmy Dean and a bag of chopped spinach, neither of which my husband likes.

Win.

Enter Pinterest, and too many different recipes to choose from, all a little different. I finally picked this one, but by this point I am getting hungry and decide that little tiny meatballs are far too much work. Crumbled sausage will work just fine.

So I totally skipped the meatball portion of the recipe, and made lots of other adaptations along the way, for either time or ingredients-on-hand’s sake. Here is what I came up with.

I’m enjoying it as I type, and it is totally satisfying the craving. Completely. That and then some. It is making my day so much better, and it’s been a really good day so far. And I will never buy the Campbell’s version again. Ever. This is far superior.

Okay, I know, enough already.

Mmmmm.

Here’s the recipe without further ado:


 Easy Italian Wedding Soup
1 lb. Jimmy Dean sausage1/4 c. red onion, chopped3 cloves garlic, minced1-2 carrots, sliced1-2 stalks celery, chopped small7 c. chicken broth1 12-oz pkg. frozen chopped spinach8 oz package penne pasta 1 Tbsp. dried oreganoSalt & pepper. 2 eggsParmesan cheese  
Brown sausage. I added a little water along the way to prevent it from burning. Place colander over a soup pot and drain sausage into it. You should have sausage drippings almost covering the bottom of your pot. Set sausage aside.
Heat sausage grease over low-med until a drip of water dropped in sizzles. Now add onion, garlic, carrots & celery. Cover and cook for about 10 min or until veggies are tender. Be careful not to let the garlic burn. If it starts to brown too much, add a little chicken broth.
Add broth, sausage, spinach, pasta, oregano, salt & pepper. Bring to a low boil. Cover and boil 10 min or until pasta is done.

Dip out some of the broth and put it in a small saucepan. Whisk the eggs into it and return to pot. Cover and cook until eggs are set. Serve garnished with Parmesan.


Nicole's notes: 
Sausage
I used Jimmy Dean because there's just enough grease for this recipe. Although we will go store-brand on a lot of things, sausage is one we don't, because of the grease factor. The Jimmy Dean sausage just seems to crumble better and there's almost no grease to drain off. Absolutely perfect for recipes like this one.  I used hot, but Italian, sage, or original would be good too. Maple would probably be weird.

Pasta
For the pasta, the original recipe called for ditalini (almost like short macaronis. I had to Google it.) and some of the others called for more of an orzo or stelle, but we had nothing like that in our pantry. Snowed in, remember? I used Penne and it is yummy. I had macaroni but I thought that would be weird, and of course linguini or angel hair would not have worked. My other option was shell noodles, but I am saving those for some epic mac-n-cheese. Shell mac-n-cheese was always my favorite.

Salt & Pepper
The original recipe called for 1 tsp of salt and pepper (I wasn't sure if that meant combined, or each) but I didn't use that much. I used a combination of some broth I canned this summer, and broth made my chicken boullion. Use less salt if you’re using chicken boullion to make your broth.

Broth
Use a little more broth if you like a brothy soup. I think I'm more of a creamy soup or stew gal, because I don't like a lot of extra broth. I didn't completely measure the broth when I was making this, but I'm pretty sure it was real close to the 7 cups the original recipe called for. It doesn't have much broth now that the noodles are cooked.

 Pin it


Thursday, December 19, 2013

The Apparent Project

UPDATE January, 2014: I am leaving this post up so that you can see a sample of the beautiful jewelry you can get through the Apparent Project. I did have to send the remainder of items back, however, so I cannot fill any orders from the pictures below. Learn more about how you can still help here.

~~~~~~~~~

To all my sweet readers, you get to help some families this week!

Nouvelle Mere on Etsy is sponsoring an Apparent Project virtual party. The Apparent Project is a 501(c)3 Non-Profit organization that helps families stay together in Haiti. 
Read more about the Apparent Project at their website http://www.apparentproject.org/
Did you know? Most of the orphans in Haiti still have one or both parents living? It's true. But they are orphaned because of poverty; being sent to an orphanage or to other homes because there is not enough income to support the entire family.

Here's where we can help. The Apparent Project has taught Haitians a craft that they can market, and then brings their products up to the US to sell them. And then the money gets sent back to the artisans so they can afford to keep their family together.

I currently have had a box of this beautiful stuff! It is primarily jewelry, and some purses, and Christmas ornaments and decor. I encourage you to please look through the pictures and select something for a last minute gift or something just for yourself.


Apparent Project- Beauty Changes Things from Corrigan Clay on Vimeo.


So let's look at the beautiful stuff!

We'll start with the Christmas decor


and some close-ups of those items, plus prices


You are loved!


The artisans use recycled materials, such as cereal boxes to create all the beautiful items. Do you recognize these? I spy Mountain Dew, Coca Cola and Diet Coke! :)


Some more fun stuff


The mini stockings are a perfect size to hold gift cards, jewelry or many of these beautiful ornaments


And close-ups of those items


More Christmas and some jewelry


close-ups of the earrings


Some of my favorites are the metal art


Up close


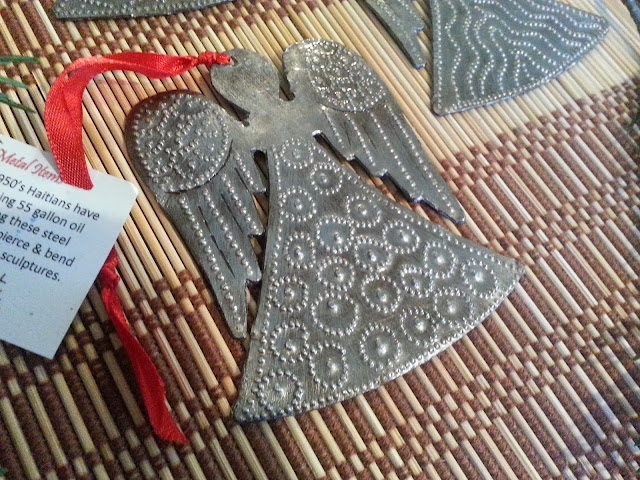
And are these angels not just precious?


Being the Nativity junkie that I am, this piece is by far my favorite.


The larger bag with green lining is about the size of a laptop 


These coin purses all have a divided pocket on the inside


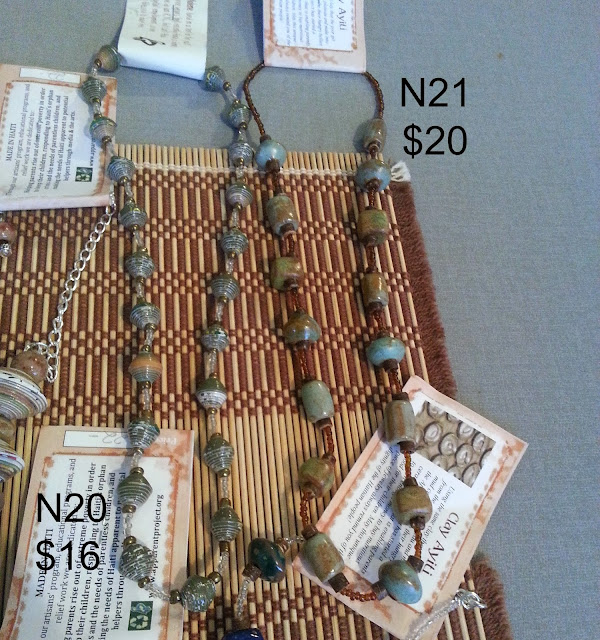
Long necklace-bracelet sets


And lots of beautiful bracelets


Don't you just love the precious faces and stories on these tags?


This one sums up our whole project; the love of Christ for Haiti. <3


I will do my best to mark items off as sold as they are purchased.
There are duplicates of some of the ornaments, and I will leave them available until all of that style are sold out. 
Items will be available until Dec 31, 2013

Thank you so much for your help with this ministry, from me and from the precious people in Haiti.

Please share this with your friends. I would love to sell as much of this as I can before I have to send it back.

 Pin It