

Ahem.
Sorry I got distracted.
Where was I? Accent table. Ah yes.

But 10 cents... shoot, who can say no to that? I figured I could make a tablecloth easy enough with all the $1/yd fabric I got for nursery stuff.
So I did. Here's how to make your own.
You will need:
2 yds fabric
Measuring tape
Pencil or chalk to mark with
Scissors
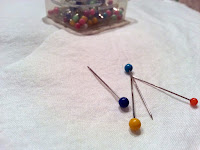
Pins
Optional but handy:
Rotary cutter
Cutting mat
Ruler or cutting guide
Here are the cutting instructions. If you are awesome, and can figure out how to fit the pieces onto 2 yds of fabric all by yourself, then skim the cutting section just for your calculation formulas.
Begin by measuring your table: across the widest part of the top, and then from the tabletop to the floor.
Mine was 20" across and 25" tall.
Cutting the circle
Add one inch to the top measurement.Open up your fabric so that its a single layer. take the number you just came up with & measure that far from the end of the fabric &make a small dot. This will be the center of your circle.
Then divide by 2.
Example: Mine was 20" across.
20 +1 = 21
21 / 2 = 10.5 (this will be your radius for cutting)

Hold the end of the measuring tape at the dot, and put a mark on the fabric at the length of your radius. (mine = 10.5)

 |
| line is really faint, but if you look close you can see it |
Cutting the panels
Refold your fabric. Measure across. It should be at least the length of the height of your table. If so, do a little celebration cheer. (If you're like me, cutting out is the worst. Yucky.)
Assuming the fabric is wide enough when it's folded, you will be able to get two pieces across it.
More math... here we go.
Finding your panel width: Take the diameter of the tabletop and multiply by pi to get the circumference.(To make it easier I went to the nearest quarter inch)
I'll use mine for the example again:
20 x 3.14 = 62.8
Divide by 4 and add 1 (for 1/2" seam allowance):
62.8 / 4 = 15.7
15.7 + 1 = 16.75
Finding your panel height: Take the height of your table and add about an inch and a half. (For seam allowance and hem.)
My Panel Height:
25 + 1.5 = 26.5
Cut four panels this size.
Mine:
Four 16.75 by 26.5 panels
You should only have to cut two strips if your fabric is folded. Then cut the fold to make each strip into two pieces.
Cutting the triangles
Now with the rest of your fabric still folded, cut a strip about 10 - 15 inches wide, and the same height as your panels. (Mine=26.5") I did 10" wide, but you could do 15" or even the remainder of your yardage to make a fuller tableskirt.
Cut the fold to make this into two pieces.
Next cut from corner to corner, to make triangles. I folded mine & cut along the fold, but you could mark it too. It doesn't make a difference.

Stack all your triangles.


Connect the dots- should be a slightly curved line. You could probably cut it straight, and no one would be the wiser. Do what you want to.

If I just made you all confused on the cutting layout, here is a diagram.

You should now have:
1 circle
4 panels
4 triangles
.Putting it all together
Pin and and sew together the skirt pieces. It should be a pattern of Triangle, Panel, Triangle, Panel, and so on. Here's a few pictures.


Pin and sew the circle to the top, making sure to keep right sides together.
TIP: Newbies, it is a little tricky to sew a round thing to a straight thing. What helps make it easier is to use LOTS of pins! Start by pinning the circle on opposite sides, matching it up to the seams on the skirt (12 o'clock and 6 o'clock) and then the other two sides, lining up with the seams (3 o'clock and 9 o'clock) and then putting a pin in the center of the space between each of those pins, and then another in the center between each of those.
Last but not least, hem the bottom. I just used a simple roll hem, and didn't even bother ironing it over. Apples to Applique has an awesome (and super easy!) tutorial on how to make a nice professional rolled hem.You could do that if you want, especially if your fabric is difficult to work with, or if your triangle pieces are very wide.

Ta Da!
Tip: You could add variety, kindof a shabby-chic look to it, and make your triangles and/or panels out of different patterned coordinating fabrics. Or you could add some trim to the bottom, or some appliques to the skirt to personalize it. Have fun with it! I would love to see pics of yours!

No comments:
Post a Comment