Showing posts with label cooking tips. Show all posts

Sunday, March 9, 2014

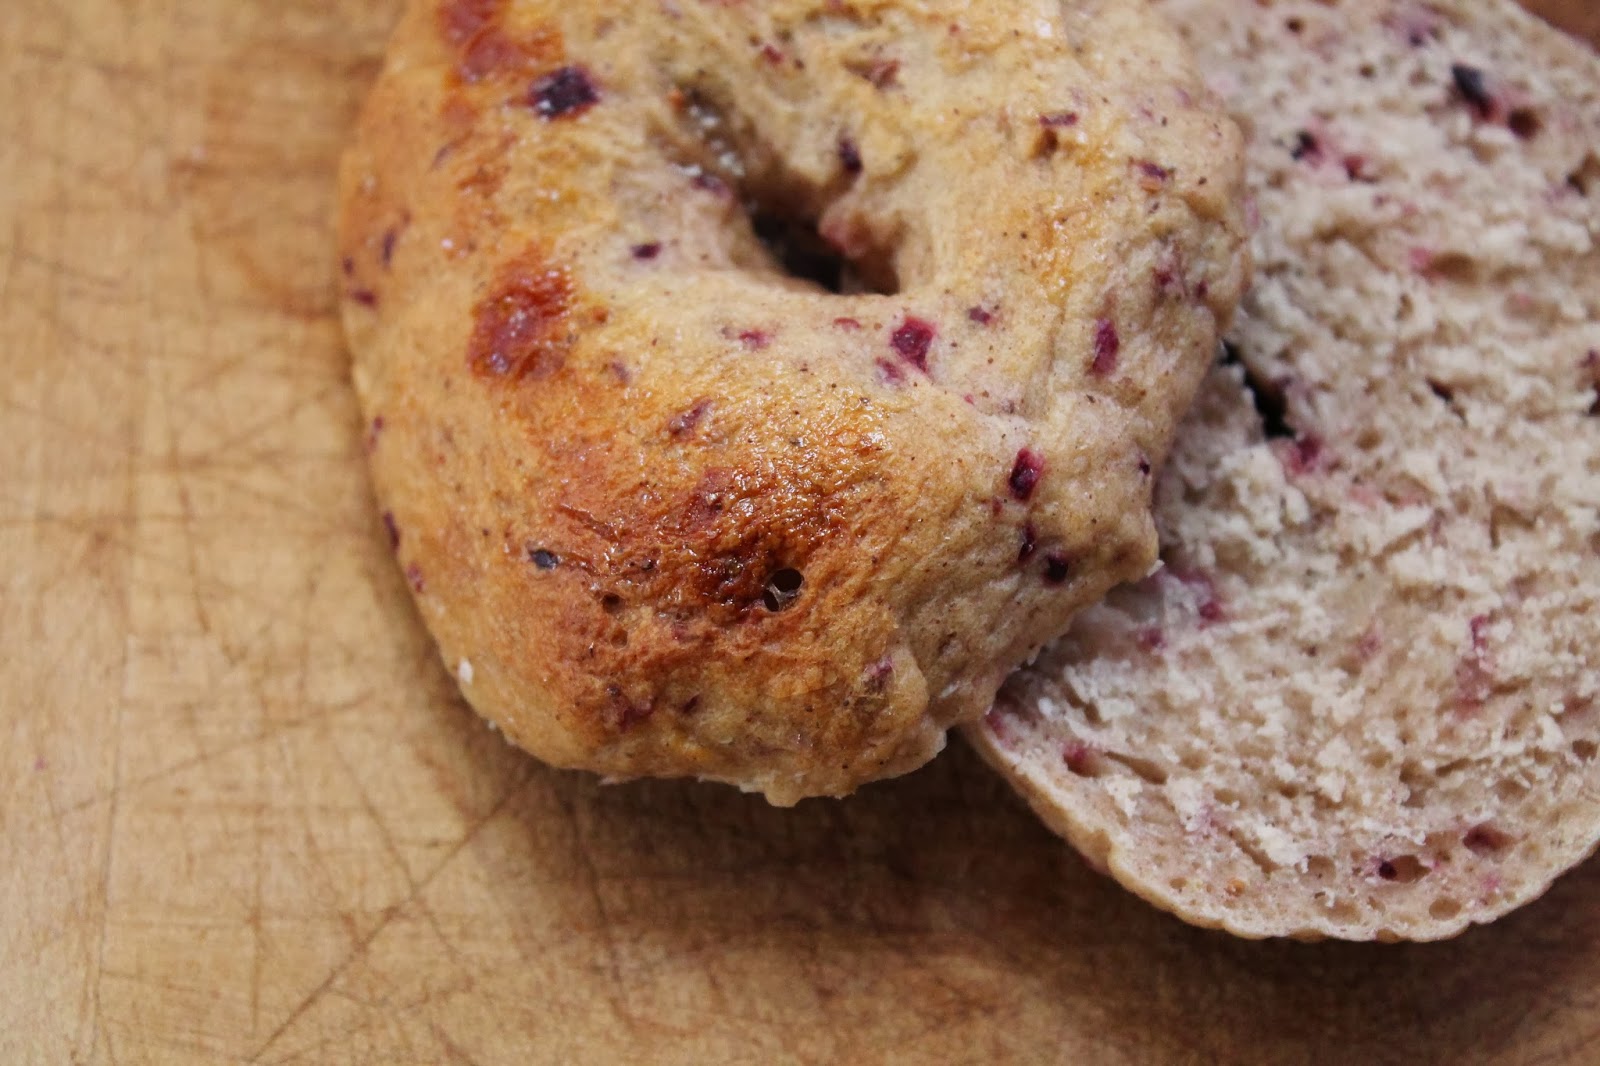
Easy Cranberry Cinnamon Bagels


Confession. I procrastinate.

There. Now that that’s out there- I will say this. I have been planning on making these bagels since cranberries were in season, and I had a coupon for them. This was back in, say, November? Maybe October? Cranberries freeze really well. It was probably dangerous to know this. I bought a couple bags back then, and they have been decorating my freezer shelf. They’re so pretty and make my freezer look festive…. Something like that.

No, really, I had just heard that bagels are a pain to make. And that was all it took to make me procrastinate trying. Oh, I was on Pinterest multiple times pinning recipes, and trying to decide on one, and then I would read the directions and then procrastinate even longer.

But I finally did it.

And they were so not a pain. And I will probably make more very very soon. It will keep my dear husband and I from buying expensive Panera bagels.


I did use the breadmaker. This helped tremendously! I just dumped ingredients in, and walked away. Then when it was done, I formed the bagels, boiled them for a minute like you’re supposed to, and baked them. That was it. Easy. And really pretty fast.

The recipe I finally decided on came from here, and I adapted it to incorporate my freezer-decorations (cranberries) and make them less sandwich-bagels and more indulgence-bagels. Because those are the best kind.

Here is my adaptation:


1 cup warm water
1 1/2 teaspoons salt
2-3 tablespoons white sugar
1 teaspoon cinnamon
3 cups flour
2 1/4 teaspoons active dry yeast
1/2 to 3/4 cup cranberries, chopped small

3 quarts boiling water
3 tablespoons white sugar
1 tablespoon cornmeal
1 egg white

Dump water, salt, sugar, cinnamon, flour, yeast and cranberries into bread maker. Preferably in that order. Select Dough Setting, and let it process.

When cycle is complete, divide dough into 8 pieces. Roll each into a small ball and flatten it a little. Poke a hole in the center with your finger and twirl around on your finger just a little to widen the hole.

Cover bagels with a clean cloth and let rise 10-20 minutes.

Nicole’s Note: I did 20 minutes because I did not have enough yeast. I probably only had about half the yeast it calls for, and they turned out fine.

While those are rising, start a pot of water boiling. Use about 3 quarts. I didn’t measure and it was fine. When it’s boiling, add the sugar.
Dust a cookie sheet with cornmeal. Flour would probably work fine too.

Carefully transfer bagels to boiling water. Boil for 1 minute.

It will probably be a little cozy, but that’s fine. They’ll float, so turn them or dunk them somewhere during the minute.


Arrange boiled bagels on prepared cookie sheet, and glaze tops with the egg white.


Feel free to customize with your favorite toppings prior to baking. Some that would be really yummy on the cranberry cinnamon would be chopped pecans or sliced almonds. I left mine alone and they are delightful.

Bake at preheated 375 degrees for 20-25 minutes, until well browned.

TIP: Store in an airtight container. If they feel too hard to use, stick a slice of bread in the container with them. (Save your unwanted bread heels. They are great for rehydrating bagels, cookies, and the like.)

 
I just love morning light, don't you?


Condensed recipe

1 cup warm water
1 1/2 teaspoons salt
2-3 tablespoons white sugar
1 teaspoon cinnamon
3 cups flour
2 1/4 teaspoons active dry yeast
1/2 to 3/4 cup cranberries, chopped small

3 quarts boiling water
3 tablespoons white sugar
1 tablespoon cornmeal
1 egg white

1. Dump water, salt, sugar, cinnamon, flour, yeast and cranberries into bread maker.
2. When cycle is complete, divide dough into 8 pieces. Roll each into a small ball and flatten slightly. Poke a hole in the center with your finger and gently twirl around on your finger.
3. Cover bagels with a clean cloth and let rise 10-20 minutes.
4. Meanwhile, boil 3 Qts water. When boiling, add 3 T sugar.
5. Dust a cookie sheet with cornmeal. Carefully transfer bagels to boiling water. Boil for 1 minute, turning after 30 sec or so.
6. Arrange boiled bagels on prepared cookie sheet, and glaze tops with the egg white. If toppings are desired, add now, prior to baking.
7. Bake at preheated 375 degrees for 20-25 minutes, until well browned. Store in airtight container

This is the bread machine that we use, and love!

pin it

Tuesday, February 25, 2014

Homemade Salted Caramel Latte

Since I’ve been pregnant I’ve been trying to steer a little clear of coffee. At least to keep the caffeine intake down to an acceptable level. I’ve discovered, though, that a latte has less caffeine than a brewed cup of coffee, so I have found a new love.

This recipe will be a copycat Salted Caramel Latte. I do use brewed coffee for this, but put less in my cup than usual, so we’re still good on our caffeine intake, don’t worry.

To start out with, you will probably want to go ahead and invest in a milk frother. They are fairly inexpensive and it will definitely pay for itself by your having skipped a few Starbucks runs. Wouldn’t take long at all, especially if you make a coffee run that includes more than one drink.

Here are a few options. I have both, my sweet hubby got them both for me for Christmas this year, not sure which one would work better, and honestly, I love both of them.

Pros and cons for each.

The battery powered one
PRO: A little faster to wash
PRO: Less pieces to get out/wash
PRO: Easy to froth milk right in your cup. (Make sure it’s just milk. Don’t add your coffee yet.)
CON: Takes a battery
CON: Must not overload your cup, or froth after you’ve already creamed your coffee. Trust me, you don’t want the mess.

The self-contained one
PRO: Make a double batch easily
PRO: Self-contained beaker makes for less mess and easier to know how much you can froth at once without making a mess
PRO: Does not need a battery
CON: More pieces to get out/wash
CON: (Obviously) Have to froth milk in a separate container from your cup

So equal playing fields, all in all. Just depends what you want to try first.

Okay. Here’s how to do it.
First, go ahead and get your coffee brewing. I make mine the regular strength that I usually do.

Now, warm up some creamer or milk or some combination thereof. About 40-60 sec in the microwave is great. For a big mug, I’m using about 1/4 to 1/3 cup of creamer and about 6-8 oz. coffee. If you like yours a little more or less creamy, adjust accordingly. My hubby is the candy-coffee drinker, and likes his the same way I do, with about 1/4 cup creamer. Play with it and see what you like best. You can always add more creamer after you taste your creation, so start with a little and go from there.

Froth! This is the most fun part. Both my frothers say to let the milk set for one minute before using, and this does seem to help the bubbles stay in my cup longer. Make enough froth to fill your cup half-full.

Doesn’t matter what order you put the items in your cup. When I’m using the battery frother, I warm the creamer directly in my cup, so coffee comes second. When I’m using the beaker, I warm it up in the beaker, and usually put coffee in my cup first. Again up to you. If you take sugar, go ahead and mix it in your coffee before adding the froth, or just add it to the creamer before you warm it. I’ve done it all combinations of ways and it seems to work just fine.

If you’re wondering how I got the coffee in the pre-foamed cup without destroying the foam, it’s not as hard as you might think. Just pour the coffee along the side, and watch the foam rise. It’s kindof fun.

Last, after your coffee with its nice topping of foam is in your favorite mug, drizzle caramel ice cream topping over top.  Shake a few shakes of salt over top and enjoy!


Variations: Add some English Toffee Torani syrup for an extra treat! It's delicious.


Notes: I use homemade creamer, made from milk and sweetened condensed milk. I actually make my own sweetened condensed milk too, and the recipe for both can be found here. I like that I can count (and pronounce) all the ingredients in my creamer. Milk, dry milk, sugar. C’est tout. Not all the preservatives you’ll find in a creamer from the store. Up to you. Not sure how store-bought creamer performs with the frothers, but if you’ve tried it, let me know.

pin it

Find me and lots of other yummy recipes on Miz Helen's Full Plate Thursday Link Party

Sunday, December 22, 2013

Easy Italian Wedding Soup


It is a snowy day. I am pregnant. I want soup. But not just any soup. I want Italian Wedding Soup. And we don’t have any cans of it, and last time I used the canned stuff it wasn’t as good as I remembered anyway. Not to mention I’m snowed in and can’t get to the store. (Or rather, my husband has the carseat, and even if he didn’t, the car doors are frozen shut)

My one year old looking at the first real snow this winter


Pregnancy tastebuds persist.

I remember that when I was grocery shopping I bought both hot Jimmy Dean and a bag of chopped spinach, neither of which my husband likes.

Win.

Enter Pinterest, and too many different recipes to choose from, all a little different. I finally picked this one, but by this point I am getting hungry and decide that little tiny meatballs are far too much work. Crumbled sausage will work just fine.

So I totally skipped the meatball portion of the recipe, and made lots of other adaptations along the way, for either time or ingredients-on-hand’s sake. Here is what I came up with.

I’m enjoying it as I type, and it is totally satisfying the craving. Completely. That and then some. It is making my day so much better, and it’s been a really good day so far. And I will never buy the Campbell’s version again. Ever. This is far superior.

Okay, I know, enough already.

Mmmmm.

Here’s the recipe without further ado:


 Easy Italian Wedding Soup
1 lb. Jimmy Dean sausage1/4 c. red onion, chopped3 cloves garlic, minced1-2 carrots, sliced1-2 stalks celery, chopped small7 c. chicken broth1 12-oz pkg. frozen chopped spinach8 oz package penne pasta 1 Tbsp. dried oreganoSalt & pepper. 2 eggsParmesan cheese  
Brown sausage. I added a little water along the way to prevent it from burning. Place colander over a soup pot and drain sausage into it. You should have sausage drippings almost covering the bottom of your pot. Set sausage aside.
Heat sausage grease over low-med until a drip of water dropped in sizzles. Now add onion, garlic, carrots & celery. Cover and cook for about 10 min or until veggies are tender. Be careful not to let the garlic burn. If it starts to brown too much, add a little chicken broth.
Add broth, sausage, spinach, pasta, oregano, salt & pepper. Bring to a low boil. Cover and boil 10 min or until pasta is done.

Dip out some of the broth and put it in a small saucepan. Whisk the eggs into it and return to pot. Cover and cook until eggs are set. Serve garnished with Parmesan.


Nicole's notes: 
Sausage
I used Jimmy Dean because there's just enough grease for this recipe. Although we will go store-brand on a lot of things, sausage is one we don't, because of the grease factor. The Jimmy Dean sausage just seems to crumble better and there's almost no grease to drain off. Absolutely perfect for recipes like this one.  I used hot, but Italian, sage, or original would be good too. Maple would probably be weird.

Pasta
For the pasta, the original recipe called for ditalini (almost like short macaronis. I had to Google it.) and some of the others called for more of an orzo or stelle, but we had nothing like that in our pantry. Snowed in, remember? I used Penne and it is yummy. I had macaroni but I thought that would be weird, and of course linguini or angel hair would not have worked. My other option was shell noodles, but I am saving those for some epic mac-n-cheese. Shell mac-n-cheese was always my favorite.

Salt & Pepper
The original recipe called for 1 tsp of salt and pepper (I wasn't sure if that meant combined, or each) but I didn't use that much. I used a combination of some broth I canned this summer, and broth made my chicken boullion. Use less salt if you’re using chicken boullion to make your broth.

Broth
Use a little more broth if you like a brothy soup. I think I'm more of a creamy soup or stew gal, because I don't like a lot of extra broth. I didn't completely measure the broth when I was making this, but I'm pretty sure it was real close to the 7 cups the original recipe called for. It doesn't have much broth now that the noodles are cooked.

 Pin it


Sunday, November 10, 2013

Better Than A Christmas Candle - Homemade Crunchy Granola

Recently I was a guest at my best friend's house for a week. And as often happens between friends, she shared something wonderful she made and I had to have the recipe.
She shared the one she used with me, and added her own adjustments, based on taste, and what she had on hand. I saw no need to alter the amazingness, so I always make the same adjustments as she did, and it comes out perfect every time.

What is the recipe you ask?

Granola.
Homemade, crunchy-perfect granola.
I had tried another granola recipe that I loved, but it burned when I tried making it crispier, and then it didn't stay crisp after a few days.
That is all well and good for someone who wants chewy granola, but not me.
Crunch crunch.

We used the original recipe from here and then after the alterations it looks a little something like this:

3/4 cup brown sugar, packed
1/4 cup water
2 teaspoons real vanilla extract
3 cups old fashioned oats (the bigger, 3-minute kind)
2 teaspoons ground cinnamon

1. Preheat oven to 275 and prepare a 10x15 baking pan lined with parchment paper.
2. Combine brown sugar and water in microwave safe dish. Microwave for about 1 min until sugar dissolves.
3. Add vanilla to sugar mixture and set aside.
4. Combine oats and cinnamon.
5. Pour liquids mixture over oats and stir well. Spread oats out on pan
6. Bake 20 min, and then stir lightly. (I more just shift them around. Leaving a few clumps makes for less crumbly granola)
7. Bake another 25-28 min, being careful not to burn. Let cool completely before putting in an airtight container to store. (Cooling it first helps keep it crisp.)

That's it! Your kitchen will smell ahh-ma-zing! It smells better than a Christmas candle to me.
Here's my comments, though on important things not to change:

First - old fashioned oats. When I bought this kind by mistake, I was frustrated every.single.time. I tried to make them in the microwave. Not only do they take 3 minutes instead of one minute. (I know. We're learning patience around here) but they overflowed! Every time I had a big fat mess in my microwave. When I was at my friend's house though, I noticed that's the kind she used, so that's the kind I bought, and then I had an epiphany.
They take longer to cook.
That means they absorb moisture slower, right?
That means crunchier granola.
That means yay!

Use real vanilla. This has gotten to be a must in my family. A no-compromise must. The taste alone is worth it. We have the vanilla from Mexico. You can find it at some world markets or on Amazon here:


 Once you start working this into your regular cooking and baking, you'll see why the difference. I have people ask me all the time "What did you use? This tastes amazing!" And I believe it's the vanilla. Yummy! It makes the most amazing homemade hot chocolate, too - I like the white vanilla for hot chocolate and the dark vanilla for my granola. Try both and let me know what you like best!

Those are the main unchangeables for this recipe.
The entire recipe fits beautifully in a 1-qt size mason jar. I use a mason jar and have it on the shelf with my other cereals. My friend stores it in a large Ziploc bag and keeps it in the fridge. Either way works fine.

We like to eat it with milk, or stirred into yogurt. How do you like to eat your granola?
 pin it!

Wednesday, October 2, 2013

Me and My Avocados

Coffee and avocados.
This is a common snack for me.
When we have avocados. We went on vacation and emptied our house of all fresh produce before we left, so nothing would go to waste. And then we didn't go grocery shopping for like a week after we got back.

Torture.

But alas, I got some avocados on Monday evening (today is Wednesday) and all of them at the store were hard and bright green. A few days yet until they would be ripe. No matter- they were a good price so I loaded up. Me and baby boy love them.


I put about 5 in a lunch bag so they'd ripen faster, and the other 5 I set on top the bananas in the fruit hammock. I had heard that you should put a banana in the brown bag with the avocados to get them to ripen up, but I was afraid the banana would turn brown and be wasted, so usually it's just avocados alone in the brown bag. This normally works fine. When I'm a normal-amount of patient, and not avocado deprived, and starving.


I kept testing them, off and on throughout the day whenever I'd get hungry. I would even squeeze them through the bag so as not to let any of the precious ethylene gas slip out. We need all of it so those avocados would hurry up already. They're still hard. Still another day or two at least.

On a whim, however, I tested one from the bananas.

This one was ripe!

Happy dance!

So. All that to say they ripen even faster outside the brown bag and sitting friendly with the bananas. So I will be ripening them in the fruit hammock from now on. Good thing too, because my brown bag has really seen better days. An avocado a day since the boy was born (14 months ago) and me in and out of the bag... you can just imagine what kind of shape it's in.

And just because I had a friend ask me hows the best way to get the pit out of the avocado, and I'd spent the first 6 months or better of my daily avocado-eating just eating around it til it popped out until I learned this trick, I'll share it with you as I did him.

Slice around the avocado. Hold each side and twist them in opposite directions. If your avocado is ripe, it should just pop right apart, with pit attached to one side.


Then gently but firmly press the knife into the pit. I have tried firmly smacking it, but have often ended up with an unsightly slice where I missed. I'm too OCD for that, so I just press it in.


Then rotate the knife, mimicking the motion you made when you opened the avocado. The pit should pop right out.


There you go! Grab a spoon and the salt-shaker and enjoy.
Or top your salad or sandwich or whatever with it.
Or feed it to your baby.
Or whatever.
Key word: enjoy.


Thursday, March 21, 2013

Crispy Kale Chips in the Microwave

This is another great one for snackers who want to be healthy.
Kale chips.

I'm going to tell you two different methods of baking them, and then which one is my favorite.

I first found the recipe over at Big Flavors From a Tiny Kitchen, I have used it several times, and love it.

I did tweak it just a tiny bit- only in method, not really in ingredients.

Wash kale. You want to be kindof rough with it, to release the bitterness that kale can tend to have. When I first heard that, I was a bit confused at what that meant exactly. Finally figured out that it just means to kindof "crush" it when you wash it.
Open up the leaves. 
Press the fluffy part firmly between your hand and thumb.
 It will feel a lot softer when you're done doing this, and the leaves will look more open.

Dry kale. This step is very important. I thought the easiest way to do this was just to shake off what water I could, and then just lay it out on a couple cookie sheets to dry, and come back to it after a few hours, or the next day. I don't have a salad spinner, but I imagine that would work too. If it's not completely dry it will tend to get mushy, so I'm told. I haven't tried it because I just make sure it's dry.

EDIT: 7/26/2013 I got a salad spinner for my birthday (yay me!), and so have been using that. It works well to dry the kale most the way. Still leaves a bit of moisture, so I used this trick I've recently learned:

After cutting the kale into chip sizes, put in an airtight bowl and lay a napkin/paper towel on top the leaves before you put the lid on. Put it in the fridge and go about your day. When you are ready to make the chips, the napkin will be damp and the leaves will be perfectly dry. Perfect. This works great for storing salads, baby spinach, etc. too!


Cut the rib out of the center, and cut into pieces. Just do whatever size seems like a good size for a chip.


Spread in a single layer on your baking pan or microwave chip maker.


Yes, I said microwave! My new favorite way to cook them is in the microwave! I have the microwave chip maker, which is silicone, raised, and with holes in it to allow for air flow. I used it for the first time on kale. (the instructions that came with it said to only use it on potatoes, apples or yucca. But I tried it with kale and it worked beautifully!) This is one tool I'm pretty sure you wouldn't be able to substitute, so it's worth the small investment. I love that you can make baked chips on it- it pays for itself very very quickly when you consider how expensive baked chips can get.... especially bag after bag of them over the years.

Best of all, I found that they stay green! When you put them in the oven, they usually turn brown, no matter how careful you're being. When they're brown, they taste burnt. Burnt is yucky.

The best cook time for my microwave was 3 minutes for one tray- you'll have to add a minute or two for stacked trays. Since it was a short cook-time, I preferred to do one tray, because it was nice having one cooking while I was spreading out a layer of kale and salting it on the other tray.
Buy microwave chip tray here Microwave Potato Chip Maker - Oven Healthy Crispy Flavorful Fat-Free Set

Oven cooking pros/cons:
Pro: Cook more at once
Con: Burns more easily
Con: Longer cooking time
Con: Have to run the oven 
Microwave cooking pros/cons: 
Pro: Cooks faster
Pro: Doesn't burn as easily
Pro: Doesn't heat up the kitchen on a hot day
Con: Smaller tray means less can cook at once

Sprinkle with salt and bake.

Cook and enjoy.

Don't eat them all at once.


Recipe:

1 bunch kale
1 Tbsp olive oil
Season salt

Wash kale and let it completely dry.

Cut out stem. This is easy to do if you make one long slice along both sides of the stem.

Tear or cut the leaves into pieces.

Put into a bowl with a tight cover and drizzle the olive oil over it. Cover and shake around until its distributed on all the leaves.

Spread into a single layer on a non insulated cookie sheet, preferably one with holes in it like a pizza crisper pan.

Sprinkle with salt.
Bake 10-12 min at 350 or microwave 1 tray 3 min, 2 trays 4-5 min. (Microwave ovens vary, so start with the lesser time- you can always add more if they're not cripsy yet.)
Tip: Don't let it burn. If it's brown, it's a bit burnt, and will taste bitter.
A couple chips that did get burnt
Now you see why it's my favorite to use the microwave?
Trust me on the "don't eat them all at once" part.


Try them and let me know what you think!

This post contains affiliate links. I earn a small commission from any purchases made through this post (Thank you!) but only recommend products I have tried personally.


Wednesday, February 27, 2013

Easy Cake Decorating Trick

First, I want to say, this should really only be used for home-cakes. Because of copyright issues I'm pretty sure you could get in trouble if you tried to sell cakes with these kind of decor on it.

That being said, let's have some copy-cat fun!

I got volunteered to do the cake for one of my husband's co-workers' birthday party at work.
My husband's sensible, logical mind had conjured up an image of a 9x13 cake with chocolate frosting.
The end.

My not-always-sensible, let's-make-everything-more-fun mind conjured up an image of what cool thing could we put on this cake??
Mind you, we started talking about it in the evening before the day he was supposed to bring it, so any idea we had was rather last-minute.
Like chocolate. That would've been the simple thing to do.
Probably why I didn't pick it.

I knew this guy is a Dr. Who fan, and so I thought about mixing up some blue icing and putting a Tardis on there. I even thought about making a 3-D Tardis out of graham crackers and royal icing... gingerbread-house style, and decided that really was probably too much work, and that a 2-D Tardis would be just fine.
Then, I'm not really sure how this idea popped in my head, but we then talked about doing an Apple cake. Or, as my husband wanted to call it, the iCake. This guy is also a big Apple fan.
I'm staunchly prejudiced against Apple, for no good reason really, than to pick a side, but please keep your comments of one opinion or the other about the matter to yourself. Or at least just keep them kind. :) Thanks in advance.

Back to the cake. iCake it is.
I probably could've free-handed it, but I wanted it to look exactly right, and I didn't want any "Ohhh. That's supposed to be an Apple. Got it. Uh, thanks." So decided to use this little trick I'm going to pass on to you.

First, find an image you want to use. Simple is better, but can be a little complicated if you're up to it, and if you're up to mixing more colors of icing and all that. But this one is going to be simple.

First, you will get best results if the cake is iced with icing that has had a chance to "crust". You can use the Wilton buttercream recipe, or do like I did this time, and mix some meringue powder into a can of regular icing. I did 1 Tablespoon into 1 can of icing. This way, your icing will not be sticky or gooey anymore, and will be more durable when you're working on it.


Trace it on parchment paper. Wax paper would work fine too. Regular paper probably would too, for that matter.
(yep. tracing on my computer screen again.)

Flip the parchment paper over, and use a fine icing tip or some piping gel and trace the lines.


Then gently position the paper over the cake where you want it.


Gently rub little circles over the icing or piping gel. The warmth from your hands will help it soften and transfer to your cake.

Then remove the paper.

Ta da! Now all you need to do is fill it in.


Then, smooth the filled-in part, being careful not to smear it outside the lines.

The end! That's all there is to it! Have fun... I'd love to see pictures of your cake creations!