Showing posts with label upcycle. Show all posts

Monday, February 23, 2015

Doing Away With Tissues and Using Our Sleeves

We're a cloth diaper family. I don't really do it because I care about the environment, although I agree that is important.
Mainly I'm cheap and hate buying disposable things.

We make our own baby wipes for the same reason. While, yes, they are disposable, they are cheaper, and I know what's in them.

When I can, I make our own spices, as well, such as pumpkin pie spice, ranch dressing mix and taco seasoning mix. Partly for health reasons, but mainly because 1) they taste better, and 2) CHEAP!

I am cheap frugal when I can be. Allergy season had me cringing over the amount of Kleenex boxes we were going through. And sometimes (okay, you have permission to announce "how cheap! those poor kids!") I would let my toddler's nose run just a bit longer before he was old enough to blow his nose, just because I didn't want to waste a whole kleenex if I was just going to wipe it again in another minute and a half. (I know, I know...)

So I got an idea.

Hankies.

Yep.

Not original with me.

But here's the thing. I don't know how they did it back when Kleenexes weren't a thing, and tissues were... especially with a cold, or allergies. The same ol' hankie all day long??

This is what has stopped me from trying it sooner.

But then somehow I got the idea to use some old t-shirt sleeves we had in the scrap bin. (I think these are left from the t-shirt quilt I have cut out but never sewn together.)

I cut off any seams, since those wouldn't feel good on a sore nose, and cut each sleeve into two pieces. If you want larger, just use the whole thing. I cut out a bunch! I knew we'd need several to keep us stocked while they cycle through the laundry.

I kept an empty tissue box to stuff them into. (Which by now looks a bit too beat up for a blog pic, since my two-year-old found it and decided it was a toy, or something to jump on, or who knows what, so you get a pic of what we're using right now, which is an empty diaper-liner box which is working nicely) Then after a bit of blowing our nose and running to the laundry room to discard the used hanky, I decided we needed a handy place to put them.
Hence, the little blue basket in the pic.


And again, my boy decided this was a toy, and commandeered it, and guests didn't know what they were for either, so I labeled it.
I used just a scrap piece of cardstock and punched holes in it, and tied it with some cute twine left from the goody-bag from my niece's 1st birthday.

And there we go! It's been a pretty easy transition for my family. It has taken a bit longer to get guests to love the idea, so we still have Kleenex boxes around, but we've totally saved money so far!


Thursday, January 22, 2015

Toy Spice Container DIY Tutorial

My funny little niece received a beautiful play kitchen from my sister and her hubby this year for Christmas. My sister asked for the other gifts from the family to go with it. Play dishes, food, etc.

In the midst of making dinner (and consequently, a grocery list…) I emptied a few spice containers. Thought about washing them to use for herbs from this year’s garden, and then realized I really have enough. So I thought about tossing them.
And then I remembered Christmas.
Win.
I did wash them.
And here’s what else I did with them.


I could’ve left them as-is, and it would have been fine, but I just can’t help myself sometimes. So I got out the construction paper, mod podge, marker, stencil, and a couple other fun things.

I had asked my sister whether her daughter would have fun with little things to shake in the spice containers (I’ll never forget the little toy salt and pepper she and I had growing up- they had little plastic bits you could see shaking around as you “salted” you play-food. It was delightful.), or whether she’d be frustrated at a glued-shut lid. My sister replied that her daughter loves to open things and would probably either get frustrated that it wouldn’t open, or break it open, one of the two.
Since I wanted neither to happen, I came up with a compromise, as you’ll see below.

First, I have a very technical way to measure the paper.

Lay the container next to it, make a little mark where I want to cut. Then roll it around to see how big it should be to go all the way around, and make another mark. Cut accordingly.


Told you it was technical. Ha.


When I had all the papers cut, I wrote on them. I used the Tupperware alphabet stencil I found at a garage sale. It made such adorable letters! I could have freehanded it, but I was happy enough with the stencil that I decided to go the easy route and stencil it.
I went for “Sugar”, “Spice”, and “Everything Nice”… because that’s what little girls are made of.

Not that she’ll be cooking up little girls any time soon…

I hope.

For the pepper container, since it wasn’t round, I looked at the faint folds in the paper from when I wrapped it around to see where I ought to write the words. And I wrote it on both sides. You can do yours however.


I mod-podged them on (See my newsprint tray tutorial for tips on mod podge if you’ve never done it before, so you don’t end up with wrinkly labels on your play-kitchen spices.) and then added some little paper-punch stars. I used a scrapbooking star punch, and punched various colors. I even used the construction paper packaging from the store (The one that is on the top, like the label for the pack of paper. “250 sheets! 8 colors!” or whatever… Yep I saved that.) to punch stars with. It made some of them have a fun color pattern. (I must not have gotten any pictures of that part.)

I modpodged the stars on as I did my second coat of mod podge. By the time I got to the fourth spice thing, the first was dry enough for me to add a third coat. I have no idea if it really needed that much mod-podge but I thought more is probably better when it’s going to be a toddler toy. More durable that way.

So about the shaking/opening dilemma. I really really wanted to put something in there to shake around, but wanted to honor my sisters request to just leave them all openable. Here’s my compromise.


The two “Spice” containers and the “Pepper” container I left openable and empty. They weren’t really see-through enough to warrant shaky little pieces inside anyway.


But the more clear one (from parsley or something?) also had the two-way lid (pour and shake) so the lid opened with a flip top, instead of just the screw-off. With me so far? After punching a decent amount of fun-foam confetti and putting it inside (actually I gave up on using the hole-punch and just cut little tiny pieces with scissors. It was faster)  I cut a circle in the fun-foam the same size as the lid and superglued it inside. Then I superglued the lid onto the container over that. So you can still open the shaker, but no pieces come out.
Win-Win.


And that’s all I did! You can go easier or more complicated- totally up to you. You could do more writing on it, or cut out some pictures from magazines to mod-podge on there, or whatever!
I’d love to see pics or hear your ideas of what you did.


Sunday, February 23, 2014

Skinny Jeans From Old Jeans Tutorial

We’ve all had a pair (or two, or three. Let’s be honest here) of jeans that we never ever wear because either A) we have too many other jeans we like better, or B) because there’s something wrong with them- the fit, the cut, something. I have a pair like this that I recently turned into maternity jeans and here’s the main reason. My other maternity jeans were not skinny-jeans. They did not work with my boots and I was really missing all my cute boots this winter. So I found a pair and a solution right in my own closet. On the bottom of the stack. Because I never wore them anymore. Now they’re my favorite pair.

Here’s how to turn regular flares or bootcut jeans into skinny jeans in an easy afternoon.

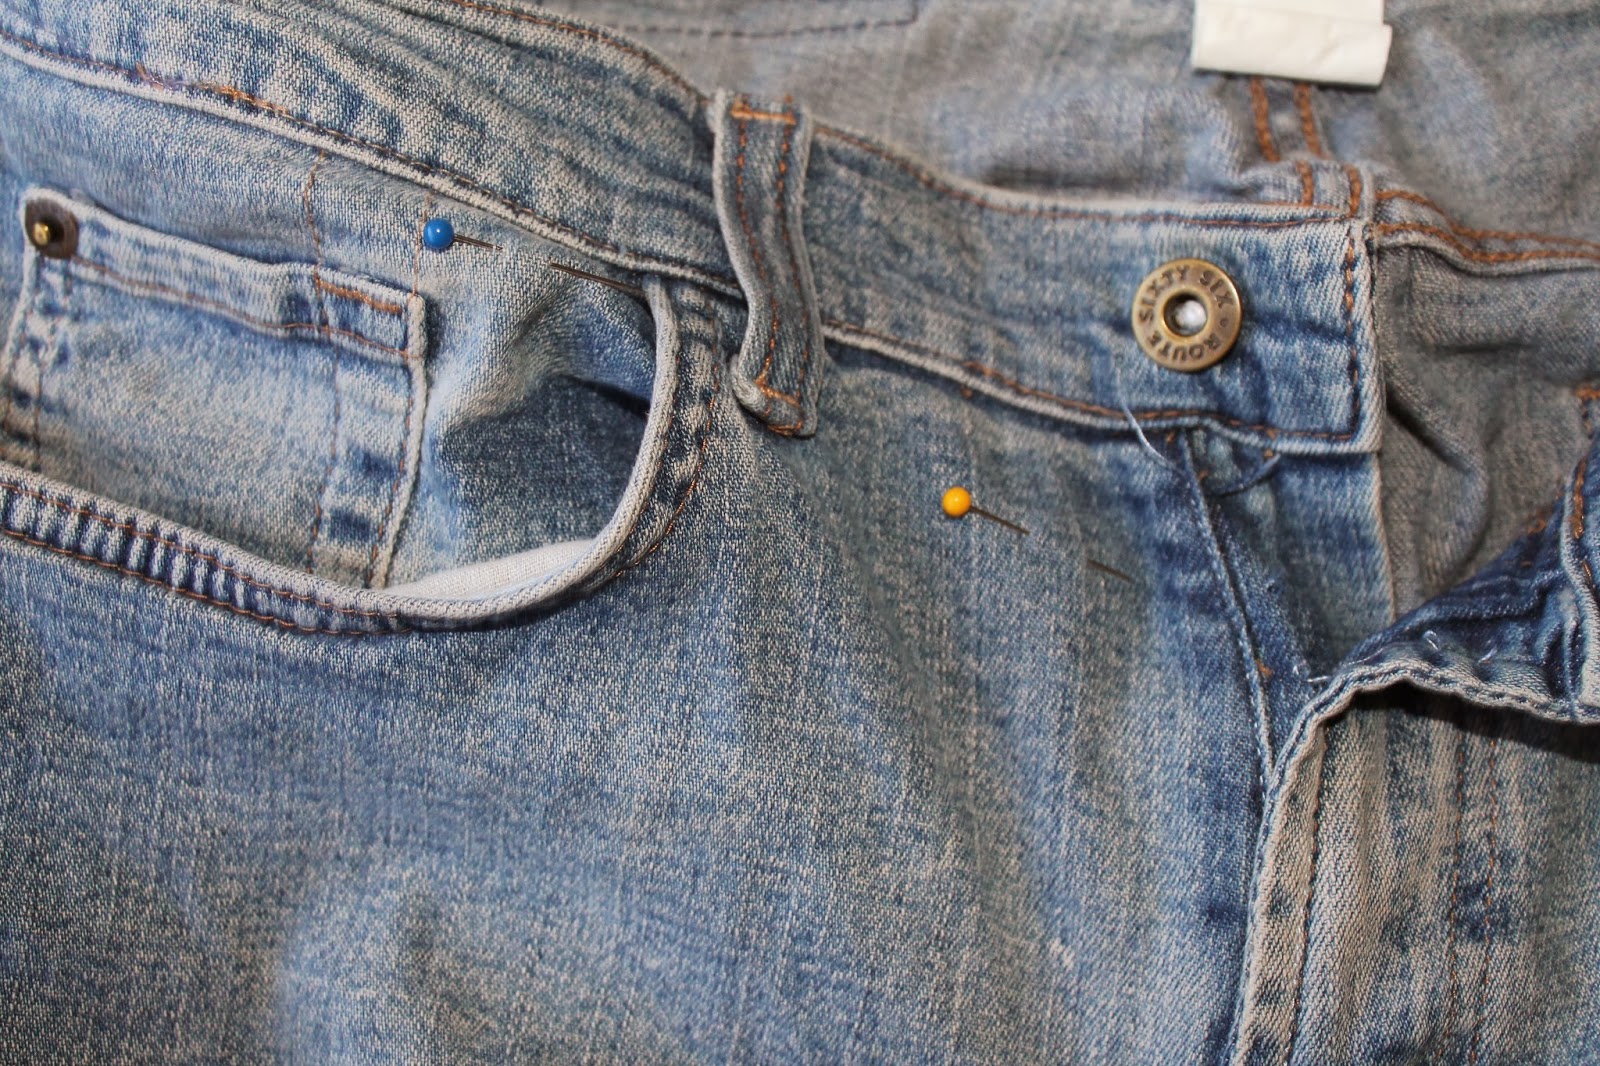
1) Lay your jeans out flat and determine at what point they start flaring out again. Put a pin there to mark it. Mine was just below the knee- yours probably will be too.
(Please note that the rest of the instructions have us working with the inner seam of the jeans. I had pinned the outer seam for the picture, and ended up moving it to the inside seam.)


2) Next, (and there’s probably another way to do this, but this seemed easy enough, dorky as it may be) stick your foot into the end of the leg and pin the cuff around the widest part of your foot. See picture. This will ensure that you’re able to actually get the jeans over your foot once you’re finished. Pin it as tight or loose as you like – my jeans have a bit of stretch in the fabric, so I went ahead and made for zero ‘wiggle room’, but if you have regular denim you may want to add a finger-width in there just in case. Your call.


3) Measure the amount you want to keep (the part that was around your foot in the previous step). Mine was right at 6”. Easy to remember so I didn’t write it down.


4) Here you get kindof a visual of the area that will be taken away. Pin to pin, essentially.
Please note that this is not the actual piece that will be taken off, but is just to give you a visual.


5) Turn your jeans inside out. With a seam ripper, rip out the inner seams from the cuff all the way up to the pin at the knee. I chose the inside of the leg but you could do the outside instead if you want. It doesn’t make a whole lot of difference.


6) With jeans still inside out, lay out the part you want to keep, measured to the length you figured out in step 3. Mine was 6”. Mark it with a pin but don’t pin it together just yet.


7) Go ahead and, using your seam ripper, rip out the cuff  where you will be stitching it together. Now pin the two together.


8) Laying the jean leg as smoothly as you can, taper from the top of where it’s ripped out (at the knee) all the way to the cuff. It may not lay very smooth and that’s okay- just make sure that it’s a nice, even taper all the way down. The triangle sticking out (the part you’re cutting off) should lay fairly smooth. DO NOT CUT IT OFF YET.


9) Stitch along the previous stitching line. I got this wrong the first go-round and had to start over. In the below picture, I’m holding the pin where the correct stitching line was on mine. You can see my first attempt (light blue thread) over to the left just a little. I left it there till I stitched the correct one, then I ripped out the wrong one. No biggie. This was important to me, because as you’ll see in the next picture, nobody will be the wiser that these jeans have been altered, because the fading by the seams is all still there just like when I bought them. (Okay, maybe not just like. They’re likely a bit more faded now because I got them back in high school. But you know what I mean.)


10) Try them on. Make sure you like the way they fit before cutting off the extra triangle. If it’s too big or too small, rip out the new seam and start over, adjusting accordingly. You’ll be glad you did. When you’re satisfied, cut off the extra triangle piece.


11) Restitch the cuff. If you did the inside seam of the jeans like I did, restitch over the seam, in the same stitching line that the manufacturer used. I should probably have used Blue Jean Gold thread for the topstitching but didn’t want to run to the store, and the light blue blends in pretty well for this pair. Pick out any remaining gold threads.


Finished! Good job! Don your jeans and grab your boots.


 pin it


Wednesday, January 29, 2014

How to Turn Jeans Into Maternity Jeans

This pair of jeans had been in the mending pile for probably a year with a small tear. My sewing area was in havoc and I had plenty of other jeans to wear, so these jeans just got put off ‘til later when I actually feel motivated to do mending’.


My husband had a new pair of jeans that had just torn, so while I was mending those, and while I had blue thread in the machine. As I mended, a light bulb went off in my head, and I realized this pair could be the answer to my problem – the problem I had of no skinny-jeans that fit, so therefore no cute boots this winter.

I have seen several tutorials on changing regular jeans into maternity jeans, and decided that is just what I wanted to do with this old pair of jeans. This pair, neglected and forgotten would soon become my everyday jeans- old flares turned into maternity skinny jeans. Win-win.

So here’s how I did it, and how you can do it too. This post will be about how to turn any pair of jeans into maternity pants. The next post will be about turning any pair of flares or boot-cut into skinny jeans.

You’ll need the elastic top- you have a few options. You could buy a maternity panel, but unfortunately this tutorial may not be a lot of help, because that is not what I used. You could also use a bella band. I bought a few with my last pregnancy, that I loved for a while but soon outgrew- and I felt they were always slipping out of place. That is essentially what we are going to be making to sew to the top of the jeans, so if you want to save yourself a few steps, you can buy one of those and use that.

I didn’t want to give up my bella bands for jeans, (though I didn’t wear them for the tops of pants, I did really love them when I was nursing) plus, because I sew on impulse, and didn’t want to wait to go to the store or to order one, so I thought of another solution. Old cami. Again, this cami was in the drawer (you’ll note the wrinkles from having not been worn in a very very long time) because it was too small and too short. I would likely never wear it again and I’m not sure why I kept it, but I’m glad I did.

So to summarize- you can get a maternity panel, a bella band, or a cami that fits really snug.


First, if you’re using a cami, make sure it’s snug. Rather than trying to get this on, I decided to measure it against the bella band I already had. I measured for width, to be sure it was the same as big around. If yours is a little wider, or doesn’t fit super snug, you can always sew up the side to make it smaller around.

measuring for width against the bella band

Next, I measured for height. Again, I just laid it up next to the bella band, and in this case it was right up under the shelf bra. Basically you want it to come to the top of your baby bump, and down just past the bottom of it. Not too much higher, or else it’ll bunch up under your shirt. DO NOT cut the finished off hem at the bottom of your cami because that will finish off the top of your maternity panel. Cut it to size up near the shelf bra.


I went ahead and saved the top of the cami that I cut off in case I need some straps or elastic or something down the road, but we’re done with it for this project.


Next, use a seam ripper to rip out the zipper. We will be sewing over this area and don’t need a zipper to get in the way.

Next, go ahead and stitch the zipper area closed- at least most of the way. Don’t backstitch, so it will rip out easily, This stitching is temporary- you’ll see why in the next step.

Go ahead and try on the jeans now. The stitching for the zipper will likely rip out a little and that’s okay- it will help you know where to sew your band.


While I had the jeans on, I went ahead and put a couple pins in where I wanted the bottom of the band to go. One near the zipper, and then one a little further to the side- just because I figured it wasn’t going to be in a straight line all the way across. It ended up preserving my pocket-use (yay! I’ve noticed a huge oversight in a lot of maternity pants- the lack of pockets!) and since it was just above the ring-pocket, I didn’t have to worry about stitching over lots of layers of denim.


Pin the band to the front of the jeans. Be sure you’ve got right sides together. Your band will probably be smaller than the waistband on the jeans and that’s okay. Go ahead and pin all the way across the front anyway. Remember you’re pinning so that you’ll be sewing the cut edge of the cami, and leaving the hemmed edge to become the top of your band. One less seam to have to finish off when you’re done.


Now sew it. Don’t forget to re-sew the zipper area since you didn’t back-stitch it.

Try it on again, and it should look something like this. If it needs adjusted, now is the time to rip it out and try again. If you’re satisfied with it, go ahead and note/pin where you want the back to lay. Mine was just below the belt-loops. Again, this way I didn’t have to stitch through several layers of fabric, and I didn’t have random belt loop ends sticking out under the band. If yours does not line up that way, consider using a seam ripper to remove the belt loops- you’ll thank yourself in a minute.


Go ahead and turn the pants such that the band goes all the way around the jeans now. It will look like this- the band will be inside-out and the jeans will be right-side out. Now pin and sew around the back. (I’m not actually sure I pinned it- I think because I had such a nice line to follow with the bottoms of the belt-loops. Up to you.)


Try them on again, and you should be quite happy with the results!

Note: I do not have a serger, plus this particular pair of jeans was pretty thin- not your traditional thick denim, so I left the top of the original jeans intact. It’s not bunchy and doesn’t bother me a bit. If your jeans are thicker, and if you have a serger (lucky you!) you will probably want to go ahead and cut off the top part of the jeans after the band is sewn on and serge the edge so it doesn’t ravel.


Ta da! In the next post we will read how to turn any pair ofjeans into skinny jeans.

 Pin It

Thursday, December 19, 2013

The Apparent Project

UPDATE January, 2014: I am leaving this post up so that you can see a sample of the beautiful jewelry you can get through the Apparent Project. I did have to send the remainder of items back, however, so I cannot fill any orders from the pictures below. Learn more about how you can still help here.

~~~~~~~~~

To all my sweet readers, you get to help some families this week!

Nouvelle Mere on Etsy is sponsoring an Apparent Project virtual party. The Apparent Project is a 501(c)3 Non-Profit organization that helps families stay together in Haiti. 
Read more about the Apparent Project at their website http://www.apparentproject.org/
Did you know? Most of the orphans in Haiti still have one or both parents living? It's true. But they are orphaned because of poverty; being sent to an orphanage or to other homes because there is not enough income to support the entire family.

Here's where we can help. The Apparent Project has taught Haitians a craft that they can market, and then brings their products up to the US to sell them. And then the money gets sent back to the artisans so they can afford to keep their family together.

I currently have had a box of this beautiful stuff! It is primarily jewelry, and some purses, and Christmas ornaments and decor. I encourage you to please look through the pictures and select something for a last minute gift or something just for yourself.


Apparent Project- Beauty Changes Things from Corrigan Clay on Vimeo.


So let's look at the beautiful stuff!

We'll start with the Christmas decor


and some close-ups of those items, plus prices


You are loved!


The artisans use recycled materials, such as cereal boxes to create all the beautiful items. Do you recognize these? I spy Mountain Dew, Coca Cola and Diet Coke! :)


Some more fun stuff


The mini stockings are a perfect size to hold gift cards, jewelry or many of these beautiful ornaments


And close-ups of those items


More Christmas and some jewelry


close-ups of the earrings


Some of my favorites are the metal art


Up close


And are these angels not just precious?


Being the Nativity junkie that I am, this piece is by far my favorite.


The larger bag with green lining is about the size of a laptop 


These coin purses all have a divided pocket on the inside


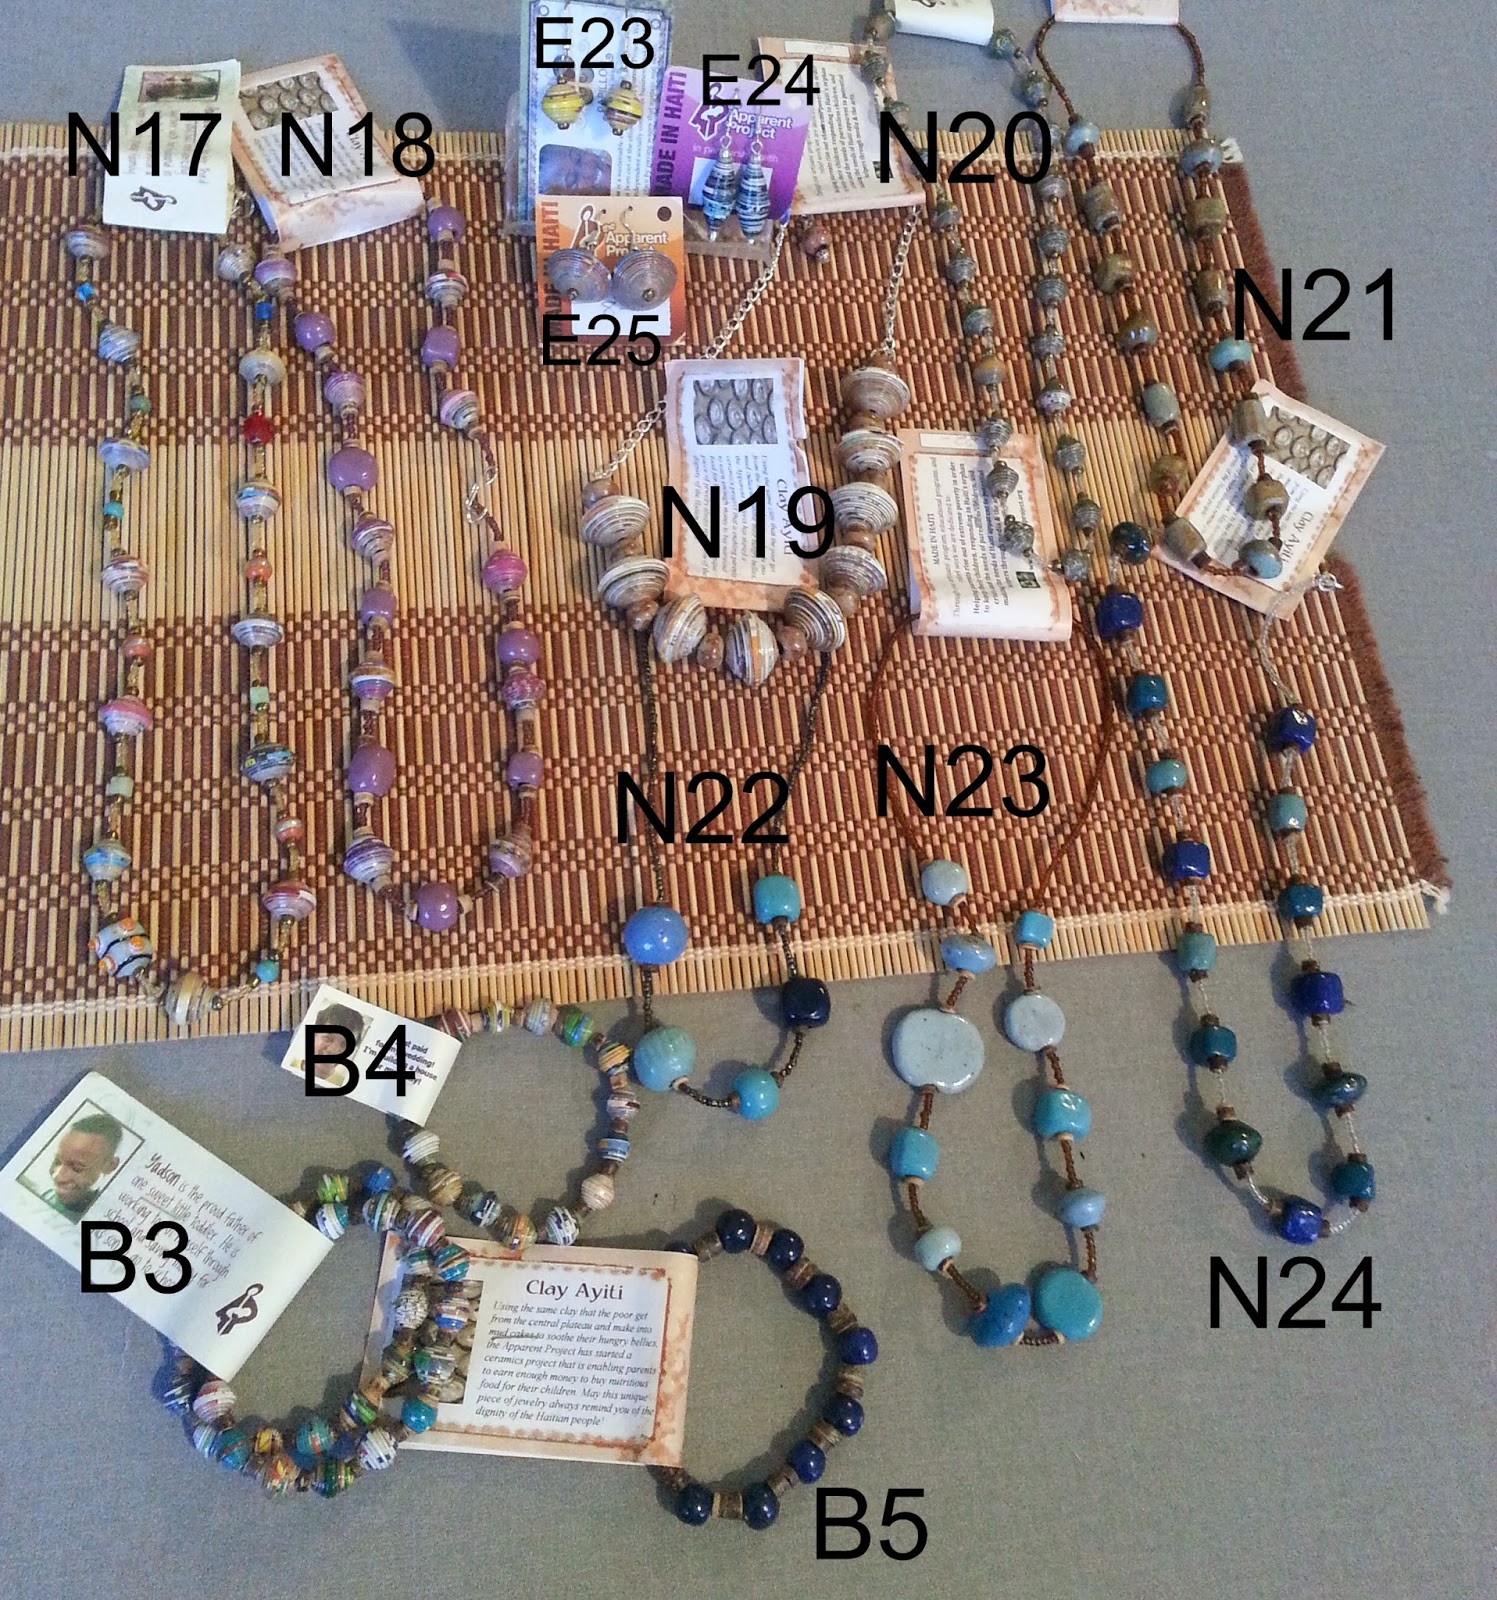
Long necklace-bracelet sets


And lots of beautiful bracelets


Don't you just love the precious faces and stories on these tags?


This one sums up our whole project; the love of Christ for Haiti. <3


I will do my best to mark items off as sold as they are purchased.
There are duplicates of some of the ornaments, and I will leave them available until all of that style are sold out. 
Items will be available until Dec 31, 2013

Thank you so much for your help with this ministry, from me and from the precious people in Haiti.

Please share this with your friends. I would love to sell as much of this as I can before I have to send it back.

 Pin It