Showing posts with label craft. Show all posts

Thursday, January 22, 2015

Toy Spice Container DIY Tutorial

My funny little niece received a beautiful play kitchen from my sister and her hubby this year for Christmas. My sister asked for the other gifts from the family to go with it. Play dishes, food, etc.

In the midst of making dinner (and consequently, a grocery list…) I emptied a few spice containers. Thought about washing them to use for herbs from this year’s garden, and then realized I really have enough. So I thought about tossing them.
And then I remembered Christmas.
Win.
I did wash them.
And here’s what else I did with them.


I could’ve left them as-is, and it would have been fine, but I just can’t help myself sometimes. So I got out the construction paper, mod podge, marker, stencil, and a couple other fun things.

I had asked my sister whether her daughter would have fun with little things to shake in the spice containers (I’ll never forget the little toy salt and pepper she and I had growing up- they had little plastic bits you could see shaking around as you “salted” you play-food. It was delightful.), or whether she’d be frustrated at a glued-shut lid. My sister replied that her daughter loves to open things and would probably either get frustrated that it wouldn’t open, or break it open, one of the two.
Since I wanted neither to happen, I came up with a compromise, as you’ll see below.

First, I have a very technical way to measure the paper.

Lay the container next to it, make a little mark where I want to cut. Then roll it around to see how big it should be to go all the way around, and make another mark. Cut accordingly.


Told you it was technical. Ha.


When I had all the papers cut, I wrote on them. I used the Tupperware alphabet stencil I found at a garage sale. It made such adorable letters! I could have freehanded it, but I was happy enough with the stencil that I decided to go the easy route and stencil it.
I went for “Sugar”, “Spice”, and “Everything Nice”… because that’s what little girls are made of.

Not that she’ll be cooking up little girls any time soon…

I hope.

For the pepper container, since it wasn’t round, I looked at the faint folds in the paper from when I wrapped it around to see where I ought to write the words. And I wrote it on both sides. You can do yours however.


I mod-podged them on (See my newsprint tray tutorial for tips on mod podge if you’ve never done it before, so you don’t end up with wrinkly labels on your play-kitchen spices.) and then added some little paper-punch stars. I used a scrapbooking star punch, and punched various colors. I even used the construction paper packaging from the store (The one that is on the top, like the label for the pack of paper. “250 sheets! 8 colors!” or whatever… Yep I saved that.) to punch stars with. It made some of them have a fun color pattern. (I must not have gotten any pictures of that part.)

I modpodged the stars on as I did my second coat of mod podge. By the time I got to the fourth spice thing, the first was dry enough for me to add a third coat. I have no idea if it really needed that much mod-podge but I thought more is probably better when it’s going to be a toddler toy. More durable that way.

So about the shaking/opening dilemma. I really really wanted to put something in there to shake around, but wanted to honor my sisters request to just leave them all openable. Here’s my compromise.


The two “Spice” containers and the “Pepper” container I left openable and empty. They weren’t really see-through enough to warrant shaky little pieces inside anyway.


But the more clear one (from parsley or something?) also had the two-way lid (pour and shake) so the lid opened with a flip top, instead of just the screw-off. With me so far? After punching a decent amount of fun-foam confetti and putting it inside (actually I gave up on using the hole-punch and just cut little tiny pieces with scissors. It was faster)  I cut a circle in the fun-foam the same size as the lid and superglued it inside. Then I superglued the lid onto the container over that. So you can still open the shaker, but no pieces come out.
Win-Win.


And that’s all I did! You can go easier or more complicated- totally up to you. You could do more writing on it, or cut out some pictures from magazines to mod-podge on there, or whatever!
I’d love to see pics or hear your ideas of what you did.


Friday, August 22, 2014

Some Do's and Don'ts with Ink Effects

Hello!
I have a quick little do's and don't list for you. A while back I won a giveaway from DecoArt, and got these super neat Ink Effects things in 4 colors plus the base coat. They have been waiting for just the right project.
I've had several ideas and finally got around to using them.

I had some fabric left over from the body pillow pillowcase I made, and am still swooning over the color, and we've been needing a bigger summer-weight swaddle bag for 'Baby Ty' (as his big brother calls him). It's so very different this time around not having a preemie. 5 lb 11 oz at birth and slow to grow/gain weight (staying in about the 1st percentile for weight until probably a year old) compared to 9 lb 1 oz at birth and in the 99th percentile for height and 75th percentile for weight this time around... SO different.

We borrowed some summer swaddlers from my sister, but big boy was getting too broad shouldered and too long for them. I decided to make one using the same pattern I'd used for our fleece lined one, except lining it with a regular woven cotton this time.
Here is where I got the awesome free swaddler pattern. I did lengthen it about 2 1/2 inches.
To lengthen yours, after your print and piece together the pattern, find the spot that's the least tapered. If you need help I'd be happy to help you- just holler at me!

And so on with the Ink Effects.
I just read the packaging and followed the directions. Pretty straightforward (mostly. I'll explain in a minute). Paint on paper, and iron onto fabric. Easy Peasy!


The ink went on beautifully and washes up really well. It has a soft texture, unlike fabric paint or iron-on transfers. It's even softer than silk-screen printing. It's like it becomes a part of the fabric. I just love it.


I did, however, have a bit of confusion with the base coat. One instruction said to use it before transfer if the fabric contained more than 60% cotton, and another place it said to use it with 30% or more. Mine was in the middle, with 35% cotton.

Hm. Now what?

I decided that since this item was going to be washed a lot, and probably on hot, that I ought to go ahead and use it. I wish I hadn't.


Since my fabric was a delicious teal (and not white) it showed up a lot. If you're going to use it on your fabric, you probably ought to saturate the whole piece- just because it will show splattery spots otherwise. It doesn't wash out- I tried.

The piece air-drying after its third unsuccessful washing
 
It goes on looking like watered down glue, (oh, use it in a ventilated area. It's stinky!) and so I figured it'd dry clear. It didn't. I didn't try washing it out before ironing, so if you have better luck with that, please let me know. Unfortunately I didn't think of that before I ironed it. I think washing it may have helped a little, and on mine it's not terribly obvious, because it's in the baby bed, wrapped around an adorable baby- so I went ahead and proceeded. If it were on a garment, though, it'd be basically ruined in my opinion. Just heads up. Test in a small area first.


The first ink transfer I had done (the words) on the piece of fabric before I'd sewn anything together just in case it messed up. I finished the swaddler and, feeling comfortable enough with the ink effects I decided to add a second ink transfer (the mountains) on the completed product.

I did.
Now, in the process of doodling the mountains I used at the top, my two-year-old decided to color with me. I just loved it! Unfortunately (yes, I know, too many 'unfortunately's in this story for my liking!) the mountains I ended up being the happiest with had colored pencil scribbles under them.
I did not realize this until too late.

Incidentally, colored pencil also heat-transfers to fabric. While this is useful information, it about made me cry. Yesterday (the day I was finally finishing the swaddler. I'd worked on it bit by bit over the last week. Toddler mom, you know) was a Terrible Horrible, No Good, Very Bad Day. (If you've never read the children's book, you should. Whether or not you have children.)


And that was the icing on the proverbial awful cake.
I ended up having to rip out everything to do with the piece that got colored pencil on it, cutting a new one, and sewing it all back together.

But I am happy with it now, and my boy didn't wake up sweaty from being in a too-hot swaddler.
Why are boys so sweaty?

So I'll sum up my short list of Do's/Don'ts for the awesome ink effects and basecoat.

DO: Test a patch of fabric first before using the basecoat.
        Use a light colored material.
        Remember to put your design in a mirror image.
        Use a CLEAN piece of paper for your transfer
DON'T: Use for the first time on something that you can't replace/do over.
              Use the basecoat unless you absolutely have to. It does change the texture of your fabric a little
              Use a paper that has colored pencil scribbles on it

That's all I can think of at the moment. It was really fun! I hope my experience helps you rather than scares you. Without the basecoat, the process was easy and fun and I couldn't be more pleased! I'm going to put a design on our fleece-lined swaddler once I think of what design I want to use.
Let me know what projects you're thinking of using them for!


This post contains affiliate links. I receive a small commission for any purchases made via the link on my post. Thank you for supporting this blog, and I hope the information I've provided has been entertaining and helpful.

Thursday, December 19, 2013

The Apparent Project

UPDATE January, 2014: I am leaving this post up so that you can see a sample of the beautiful jewelry you can get through the Apparent Project. I did have to send the remainder of items back, however, so I cannot fill any orders from the pictures below. Learn more about how you can still help here.

~~~~~~~~~

To all my sweet readers, you get to help some families this week!

Nouvelle Mere on Etsy is sponsoring an Apparent Project virtual party. The Apparent Project is a 501(c)3 Non-Profit organization that helps families stay together in Haiti. 
Read more about the Apparent Project at their website http://www.apparentproject.org/
Did you know? Most of the orphans in Haiti still have one or both parents living? It's true. But they are orphaned because of poverty; being sent to an orphanage or to other homes because there is not enough income to support the entire family.

Here's where we can help. The Apparent Project has taught Haitians a craft that they can market, and then brings their products up to the US to sell them. And then the money gets sent back to the artisans so they can afford to keep their family together.

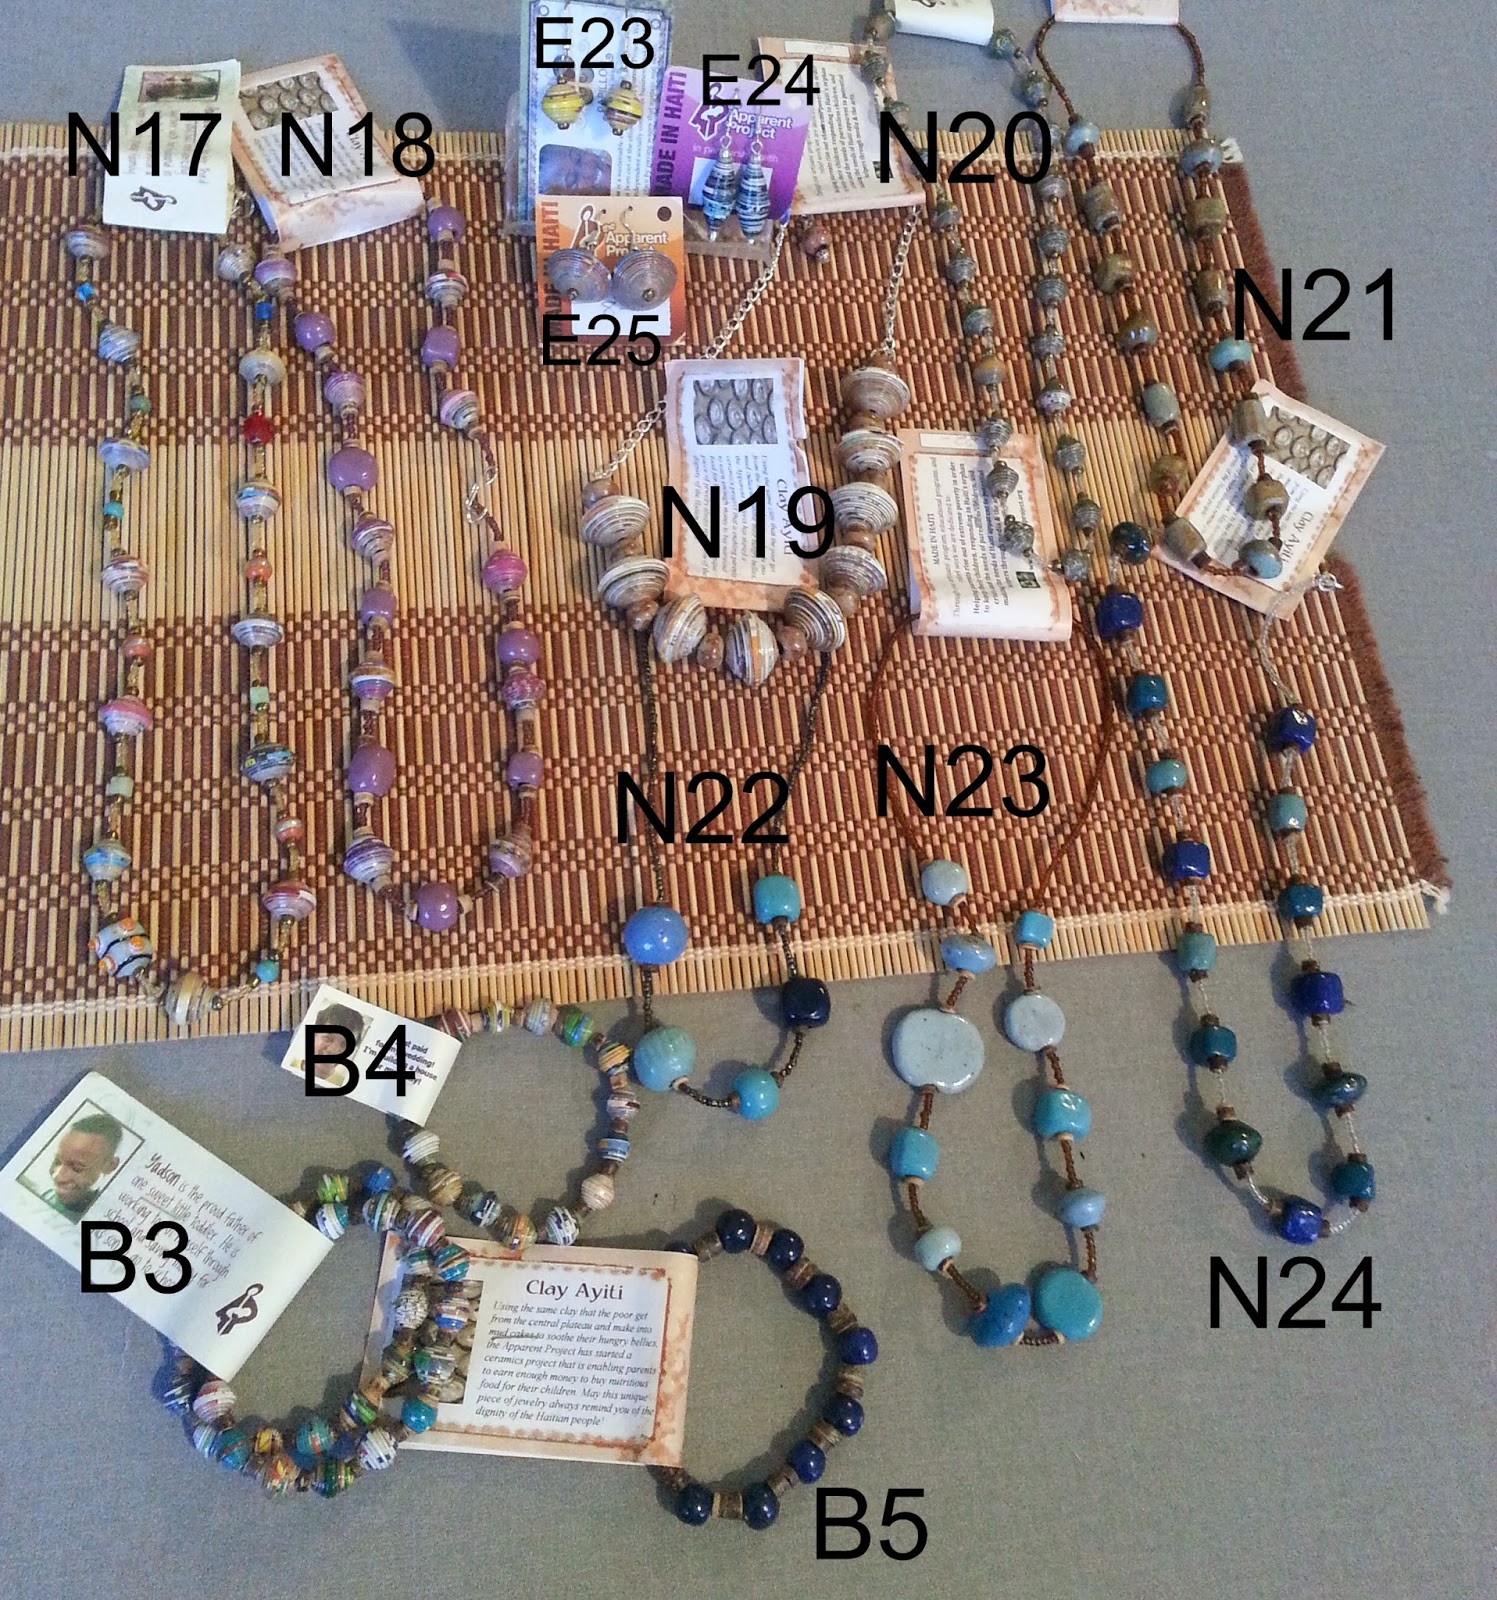
I currently have had a box of this beautiful stuff! It is primarily jewelry, and some purses, and Christmas ornaments and decor. I encourage you to please look through the pictures and select something for a last minute gift or something just for yourself.


Apparent Project- Beauty Changes Things from Corrigan Clay on Vimeo.


So let's look at the beautiful stuff!

We'll start with the Christmas decor


and some close-ups of those items, plus prices


You are loved!


The artisans use recycled materials, such as cereal boxes to create all the beautiful items. Do you recognize these? I spy Mountain Dew, Coca Cola and Diet Coke! :)


Some more fun stuff


The mini stockings are a perfect size to hold gift cards, jewelry or many of these beautiful ornaments


And close-ups of those items


More Christmas and some jewelry


close-ups of the earrings


Some of my favorites are the metal art


Up close


And are these angels not just precious?


Being the Nativity junkie that I am, this piece is by far my favorite.


The larger bag with green lining is about the size of a laptop 


These coin purses all have a divided pocket on the inside


Long necklace-bracelet sets


And lots of beautiful bracelets


Don't you just love the precious faces and stories on these tags?


This one sums up our whole project; the love of Christ for Haiti. <3


I will do my best to mark items off as sold as they are purchased.
There are duplicates of some of the ornaments, and I will leave them available until all of that style are sold out. 
Items will be available until Dec 31, 2013

Thank you so much for your help with this ministry, from me and from the precious people in Haiti.

Please share this with your friends. I would love to sell as much of this as I can before I have to send it back.

 Pin It